
This guide is designed to help you get the most out of your Redis WordPress Hosting by leveraging high-speed Object Cache to supercharge your site’s performance.
Redis (Remote Dictionary Server) is a high-performance, in-memory data store that acts as a high-speed Object Cache for WordPress. This reduces the strain on your database and ensures your pages load lightning-fast for your visitors.
Step 1: Enable PHP Extensions
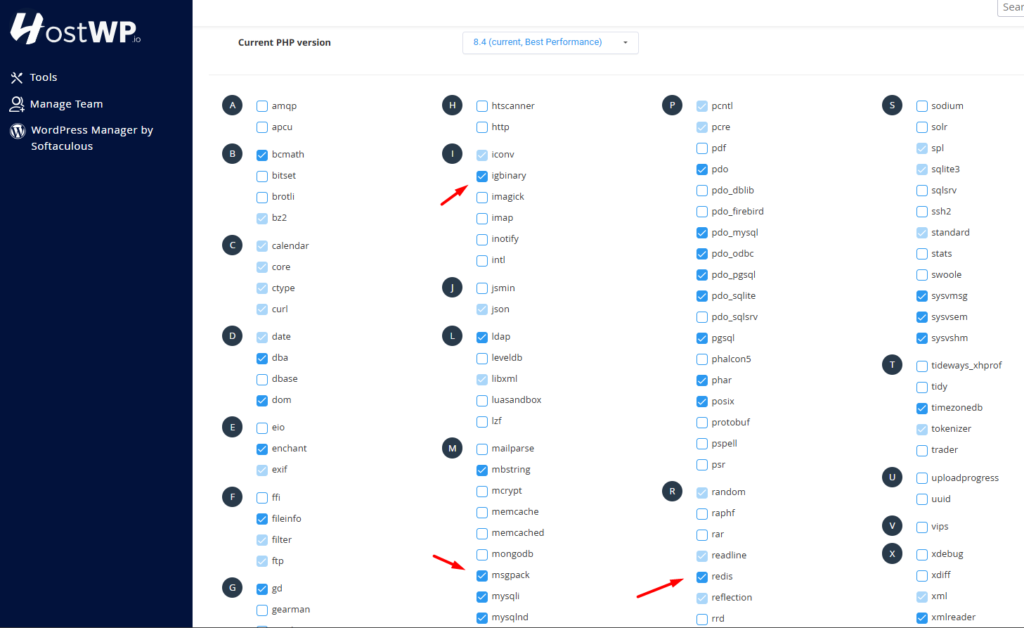
For WordPress to communicate with Redis, you must enable three specific PHP extensions in your hosting account.
- Log in to your HostWP.io cPanel account.
- Click on Select PHP Version.
- Click the Extensions tab.
- Locate and check the boxes for these three extensions:
- igbinary
- msgpack
- redis
Step 2: Enable the Redis Service in cPanel
Now that PHP is ready, you need to activate your private Redis instance.
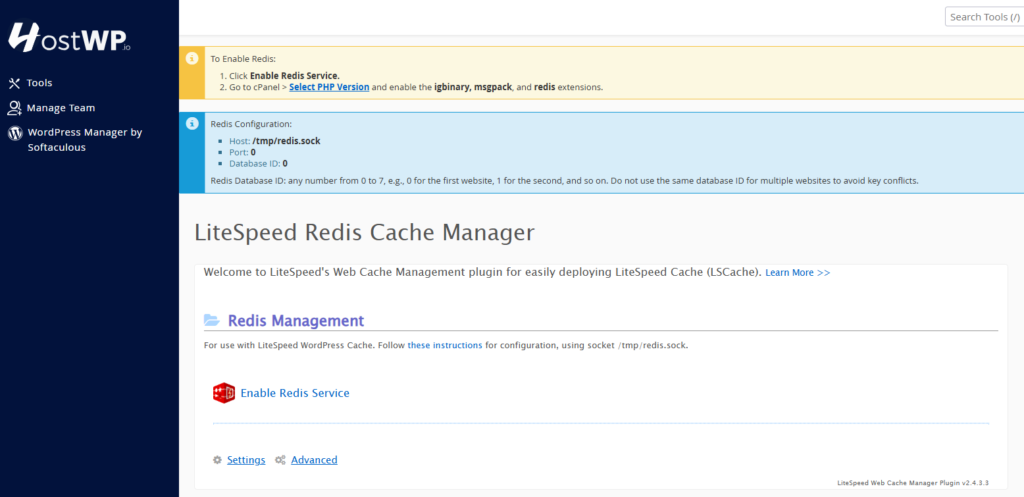
- In cPanel, go to the LiteSpeed Redis Cache Manager.
- Click the Enable Redis Service button.
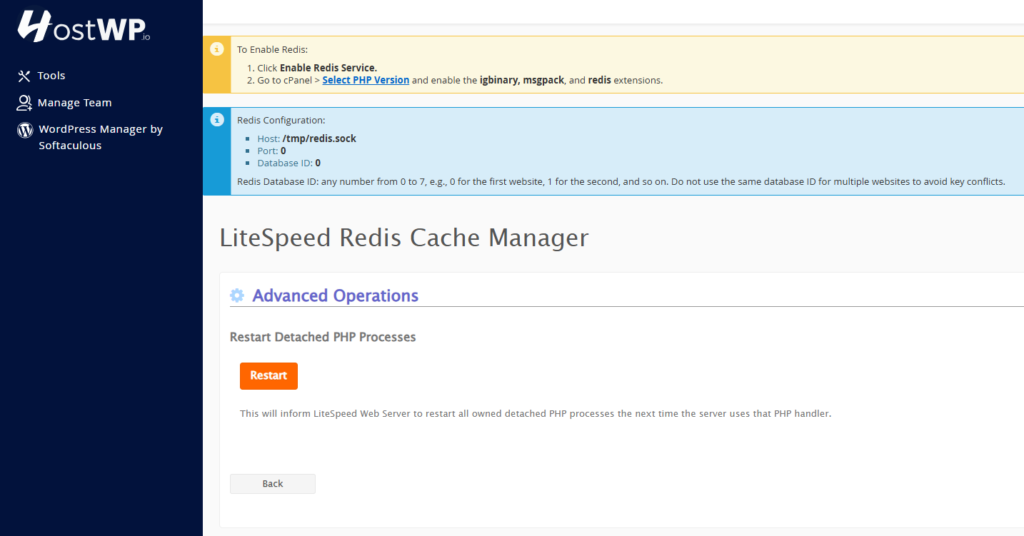
- Once enabled, note your configuration details mentioned at the top (you will need these for Step 3):
- Host: /tmp/redis.sock
- Port: 0
- Database ID: 0
Step 3: Connect WordPress to Redis
You can choose between using the LiteSpeed Cache plugin or the standalone Redis Object Cache plugin.
Option A: Using LiteSpeed Cache Plugin
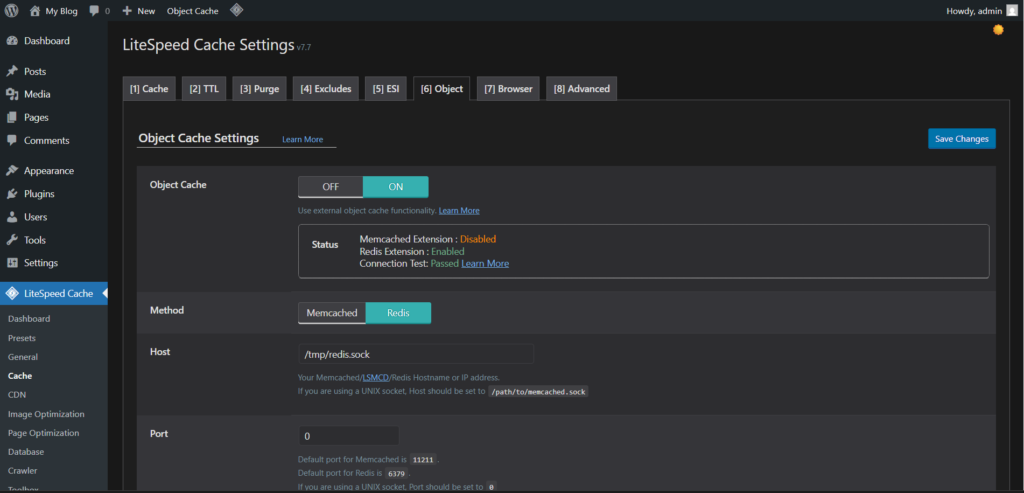
- In your WordPress Dashboard, go to LiteSpeed Cache -> Cache -> Object.
- Set Object Cache to ON.
- Method: Select Redis.
- Host: Enter /tmp/redis.sock
- Port: Enter 0
- Redis Database ID: Enter 0
- Scroll down and click Save Changes.
💡 Pro Tip for Multiple Sites: You can use Redis for multiple websites on one account. Use Database ID 0 for your first site, ID 1 for the second, and so on to avoid data conflicts between sites.
Option B: Using the “Redis Object Cache” Plugin
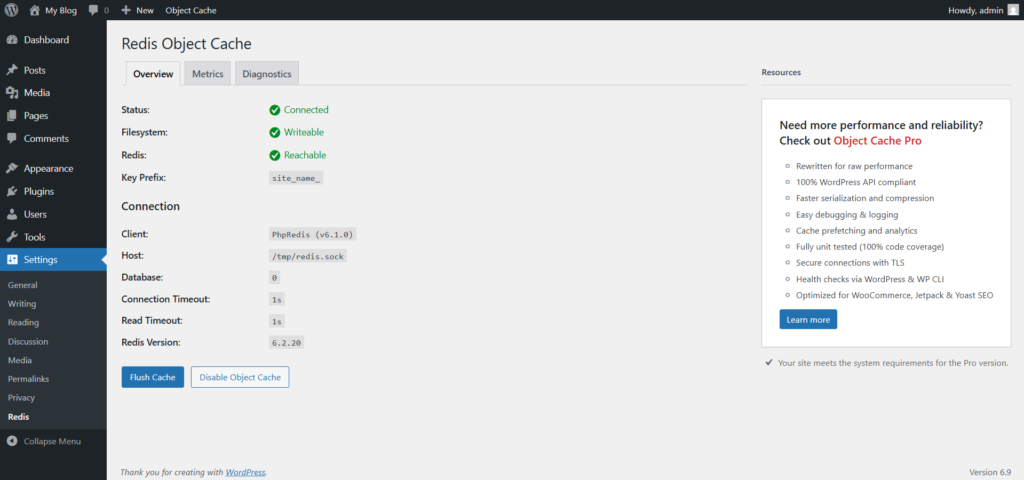
If you prefer using the standalone Redis Object Cache plugin, follow these steps to ensure a successful connection:
- Install and Activate the Redis Object Cache plugin from the WordPress repository.
- Open your wp-config.php file and add the following code above the line that says /* That’s all, stop editing! Happy publishing. */:
// Enables the cache functionality in WordPress
define( 'WP_CACHE', true );

// Redis Configuration for HostWP
define( 'WP_REDIS_SCHEME', 'unix' );
define( 'WP_REDIS_PATH', '/tmp/redis.sock' );
define( 'WP_REDIS_PORT', 0 );
define( 'WP_REDIS_DATABASE', 0 );

// This helps prevent "cross-talk" between different sites on the same server
define( 'WP_CACHE_KEY_SALT', md5( __DIR__ ) . '_' );
Step 4: Finalize the Connection (Important)
If the plugin does not show “Connected” immediately, you must perform these two actions in cPanel to refresh the service:
- Go back to cPanel -> LiteSpeed Redis Cache Manager.
- Click the Flush Cache button to clear any old data.
- Click the Advanced tab and click Restart next to Restart Detached PHP Processes.
Once you refresh your WordPress settings page, the status should now show as Connected.
With Redis enabled, browse your WordPress admin dashboard and your front-end. You should notice an immediate improvement in responsiveness!
Need assistance? If you run into any issues during setup, please open a support ticket, and our team will be happy to help.