
Connecting your domain correctly is the most important step in taking your website live. This guide covers everything from pointing your domain to our servers to managing advanced DNS records.
1. Finding Your Connection Details
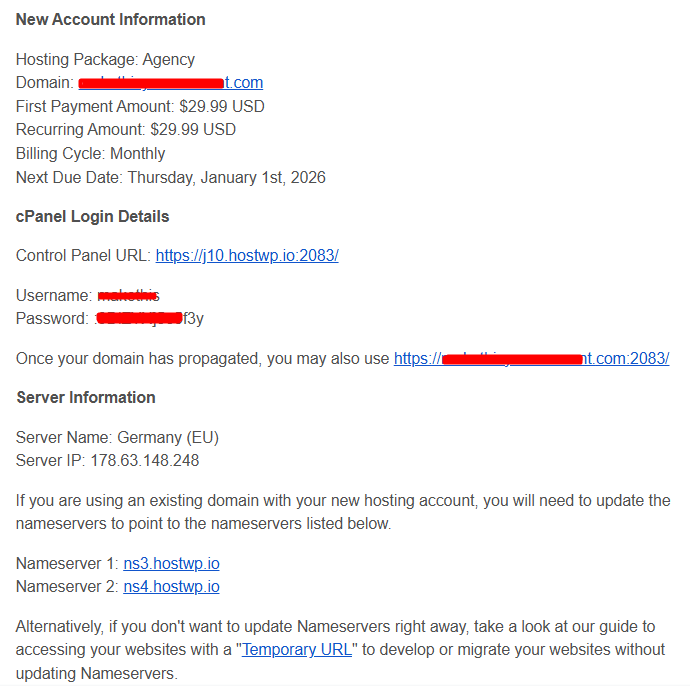
Before you begin, you need your unique server details. These were sent to you immediately after your purchase.
- Search your inbox for an email titled: “New Account Information”.
- In this email, you will find your Assigned Nameservers (e.g., ns1.hostwp.io) and your Server IP Address. Keep these handy.
2. Choosing Your Connection Method
There are two ways to connect your domain to HostWP.io:
- Method A: Using HostWP.io Nameservers (Recommended) You “hand over” DNS management to us. You will manage all records (Email, Verification, etc.) inside the HostWP.io cPanel.
- Pros: Easiest setup; our team can also fix DNS issues for you.
- Method B: Using an A Record (Point to IP) You keep your DNS at your registrar or a service like Cloudflare and simply point the “A Record” to our IP.
- Pros: Your existing email or third-party DNS settings stay exactly where they are.
3. How to Point Your Domain to HostWP.io
Log in to your domain registrar (e.g., Namecheap, GoDaddy, Porkbun) and follow these steps:
Option 1: Updating Nameservers
- Find the Nameservers section for your domain.
- Select Custom Nameservers.
- Enter the Nameservers found in your “New Account Information” email.
- Save changes.
Option 2: Updating the A Record
- Locate the DNS Management or Zone Editor at your registrar.
- Find the A Record for @ (your main domain).
- Update the value to your HostWP.io Server IP.
- Ensure a CNAME for www points to @ or the same IP.
4. Adding More Domains to Your Account
If your plan supports multiple sites, you can add them via cPanel:
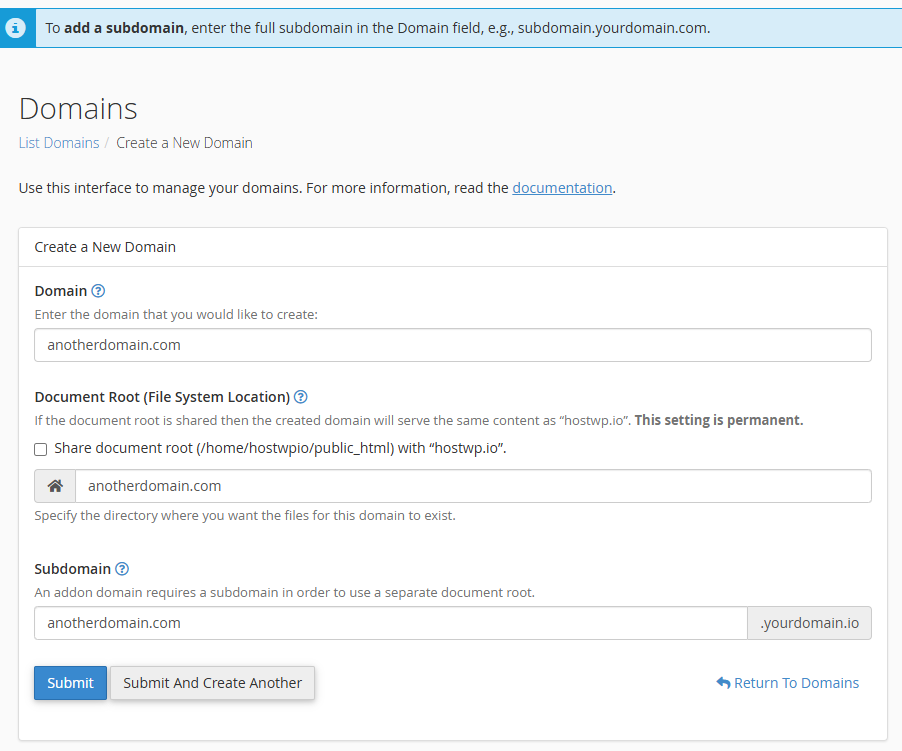
- Log in to cPanel > Domains > Domains.
- Click Create A New Domain.
- Enter your new domain name.
- Important: Uncheck “Share document root” so the new site gets its own folder and stays separate from your main site.
- Click Submit.
5. Advanced DNS Management (Zone Editor)
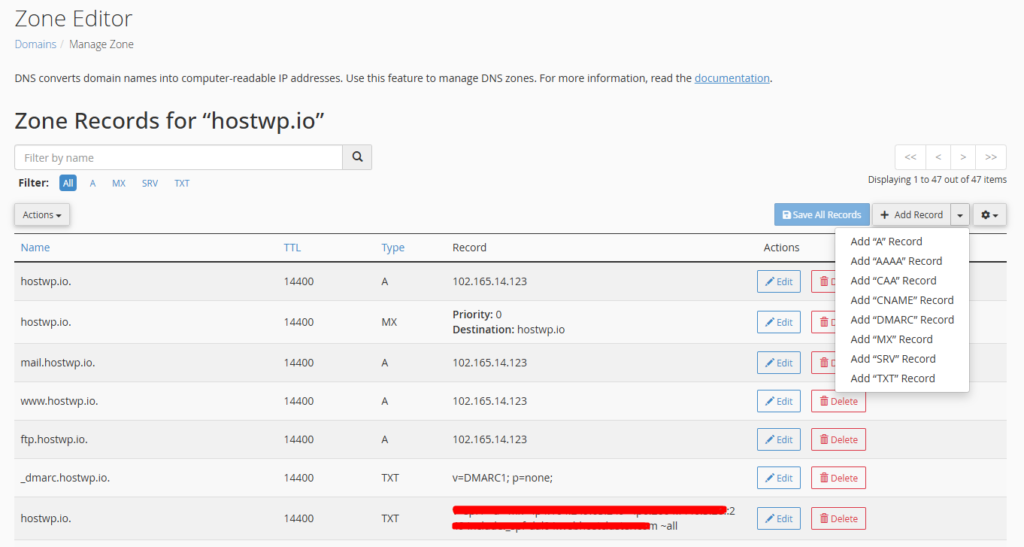
If you need to connect Google Search Console, MailChimp, or set up external tools, use the Zone Editor in cPanel:
- Click Manage next to your domain in the Zone Editor.
- Use + Add Record to create:
- A Record: Points a name to an IP.
- CNAME: Points a subdomain (like blog) to a domain.
- TXT: Used for site verification (Google/Bing) and SPF/DKIM records.
- MX: Manages where your email is delivered.
6. Understanding DNS Propagation
Once you save your changes, they are not instant. This is called Propagation.
- How long? Usually 1–4 hours, but it can take up to 48 hours globally.
- Why? ISPs worldwide “save” old data to speed up the web and only check for updates periodically.
- How to Track: Use DNSChecker.org to see if your new settings are live.