
WordPress updates are essential for keeping your website secure, functioning properly, and equipped with the latest features. However, sometimes these updates can cause unexpected issues with your site’s functionality or appearance. In such situations, knowing how to revert to a previous WordPress version becomes incredibly valuable.
WordPress 6.6 introduces a feature: automatic rollback for failed updates. This means you can finally set your plugins to update automatically without fear of breaking your site. If an update encounters an issue, WordPress will automatically revert to the previous stable version of the plugin. While this built-in safety net is a welcome addition, it is still essential to know how to manually roll back and downgrade WordPress core, plugins, and themes when necessary.
In this guide, we’ll walk through different methods to downgrade WordPress version, themes and plugins when updates cause problems on your site.
Reasons to Downgrade Your WordPress Version
Before we dive into the how-to, let’s understand why you might need to revert to a previous version of WordPress.
Your WordPress Website Is Using an Old PHP Version
WordPress continually evolves to support the latest PHP versions, providing enhanced security and performance. As of writing, WordPress.org recommends PHP version 7.4 or higher; however, PHP 7.4 is now end-of-life and has security and performance flaws. The good news is that WordPress is compatible with the latest PHP version, which is PHP 8.4.x, but that doesn’t mean all your plugins or themes are.
If your hosting environment runs on an older PHP version that you can’t immediately upgrade, you might experience compatibility issues with the latest WordPress update. In this case, temporarily downgrading WordPress to a version that’s compatible with your PHP version can keep your site functional until you can upgrade your PHP.
Compatibility Issues With Your Theme or Plugins
One of the most common reasons for rolling back WordPress is when a core update introduces changes that conflict with your existing themes or plugins. This can manifest as broken layouts, malfunctioning features, or even the dreaded white screen of death.
Suppose critical plugins or themes on your site haven’t been updated by their developers to be compatible with the latest WordPress version. In that case, downgrading can be a temporary solution while waiting for compatibility updates.
Your WordPress Website Is Using Outdated Themes or Plugins
Some developers abandon their plugins and themes, leaving them incompatible with newer WordPress versions. When checking the WordPress repository, you’ll notice warning messages for plugins that haven’t been updated recently.
If you rely on such themes and plugins and cannot immediately find alternatives, temporarily downgrading WordPress core can keep your site functional while you research replacement options.
Is It Possible to Downgrade Your WordPress Version?
Yes, it is possible to downgrade WordPress to a previous version, but it is generally not recommended as a permanent solution due to security implications. Older versions may lack critical security patches, which can expose your site to vulnerabilities.
However, as a temporary troubleshooting measure, downgrading can help restore functionality while you identify more permanent solutions. Always back up your website before attempting any rollback procedure to prevent data loss.
Downgrade WordPress Core
If you’ve determined that rolling back WordPress core is necessary, here are three reliable methods to accomplish this.
Method#1: Manually Reverting WordPress Version To Previous
Manually downgrading WordPress gives you complete control over the process but requires some technical knowledge:
- Create a complete backup of your site
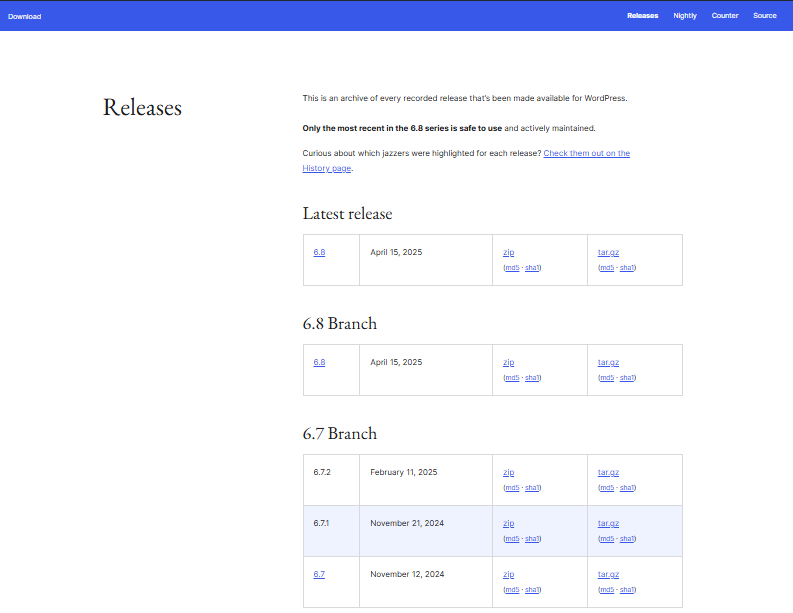
- Download your desired WordPress version from the WordPress Release Archive
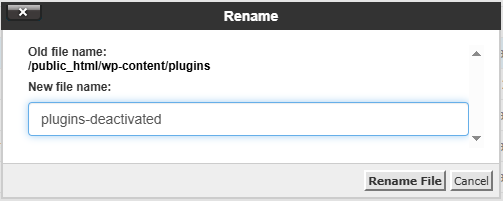
- Deactivate all plugins through your WordPress dashboard (if accessible) or by renaming the plugins folder to “plugins-deactivated” via file manager from your hosting’s CPanel
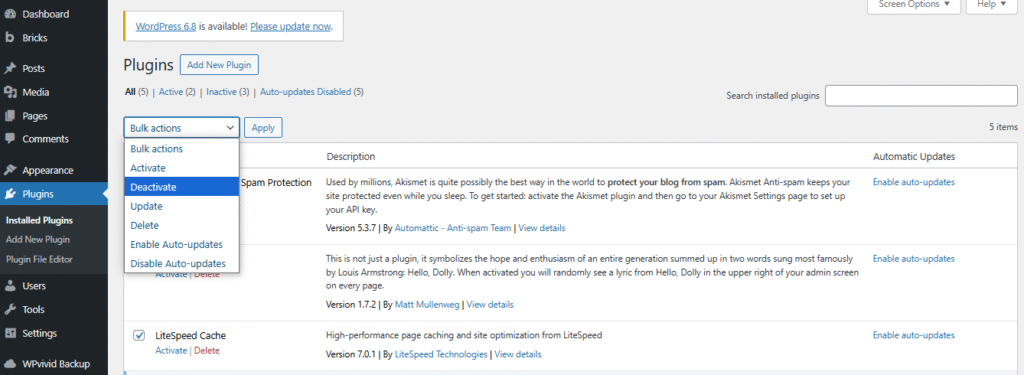
or
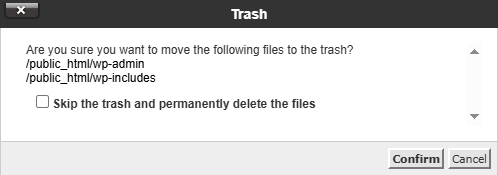
- Delete the wp-admin and wp-includes directories
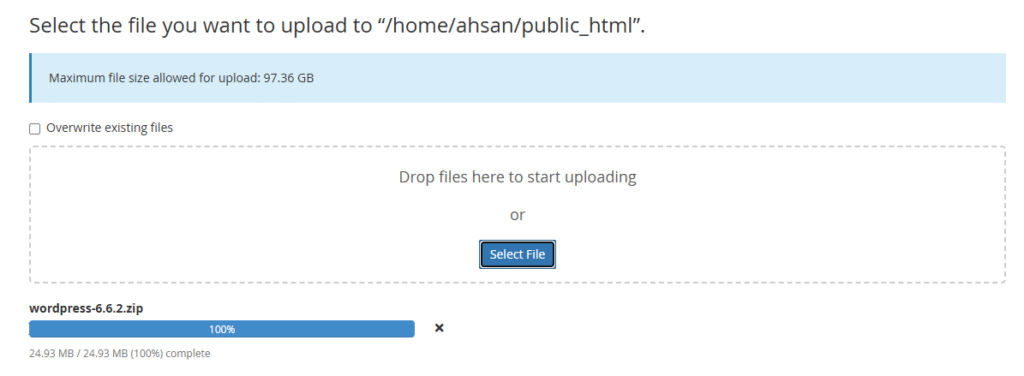
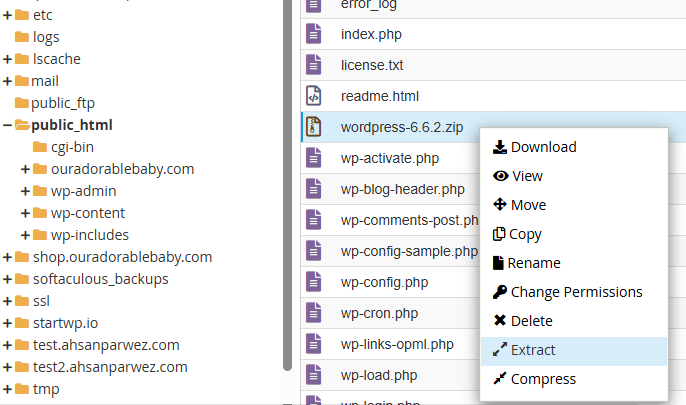
- Upload the downloaded WordPress archive and extract it into the file manager.
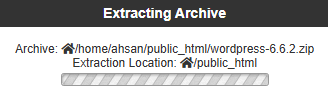
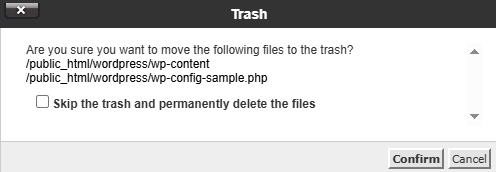
- Remove the wp-content folder and wp-config.php file (you don’t want to overwrite these on your server)
- Upload all remaining files to your server’s WordPress directory, overwriting existing files
- Access your WordPress admin area – you’ll likely be prompted to update the database.

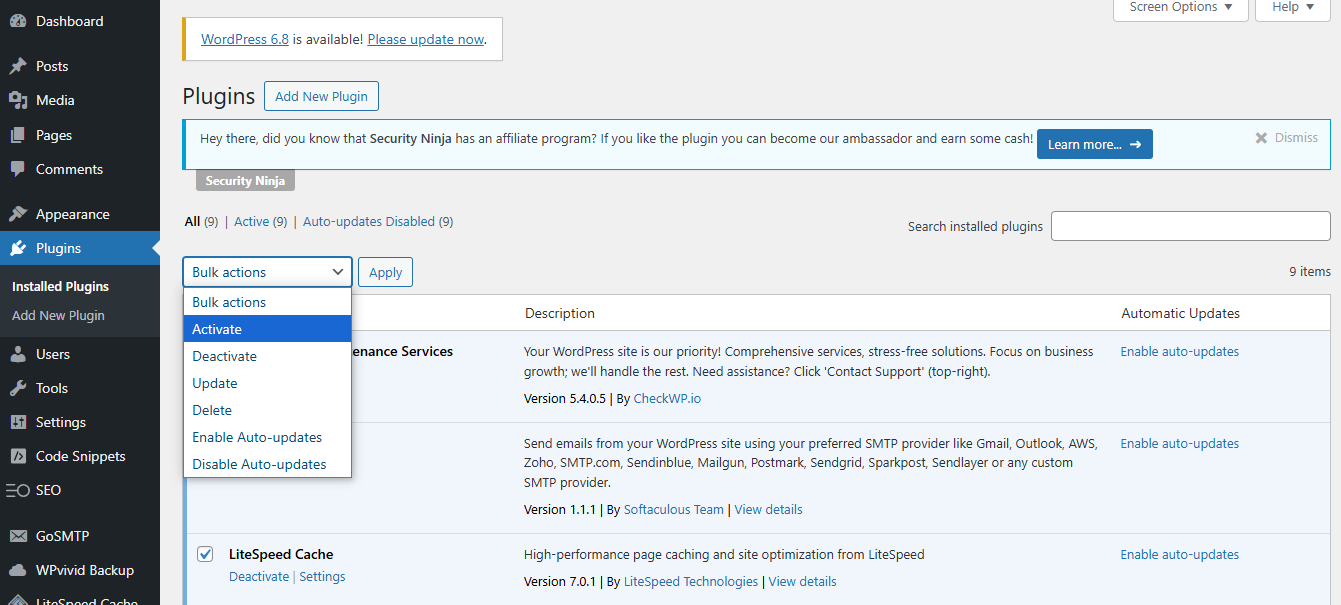
- Reactivate your plugins one by one to identify any that continue to cause conflicts.

After completing all these steps then your WordPress website will be downgraded to your desired version.
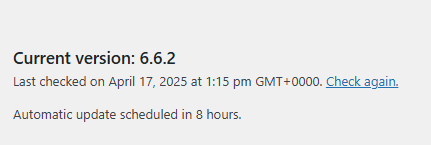
To prevent automatic updates while troubleshooting, add this line to your wp-config.php file:
define( ‘AUTOMATIC_UPDATER_DISABLED’, true );
Remember to remove this line once your issues are resolved and you’re ready to update again.
Method#2: Using a Plugin To Downgrade WordPress Version
For those who prefer a plugin-based solution with less manual intervention:
- Install and activate the WP Downgrade plugin
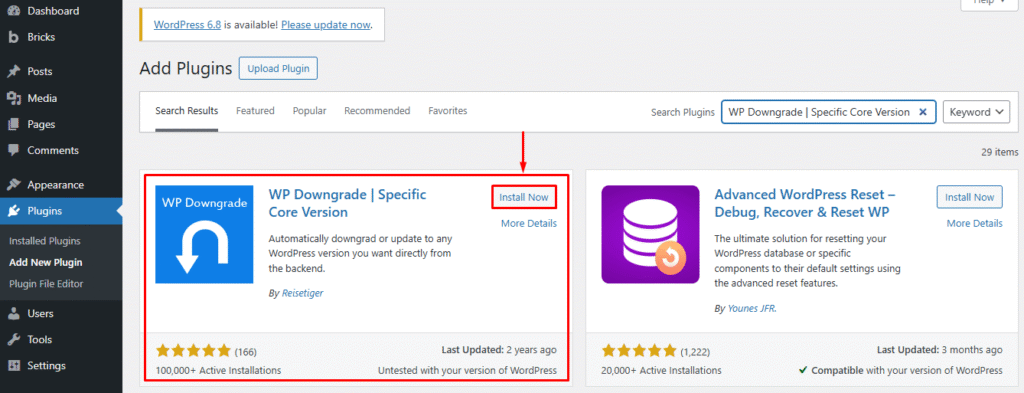
- Navigate to Settings → WP Downgrade
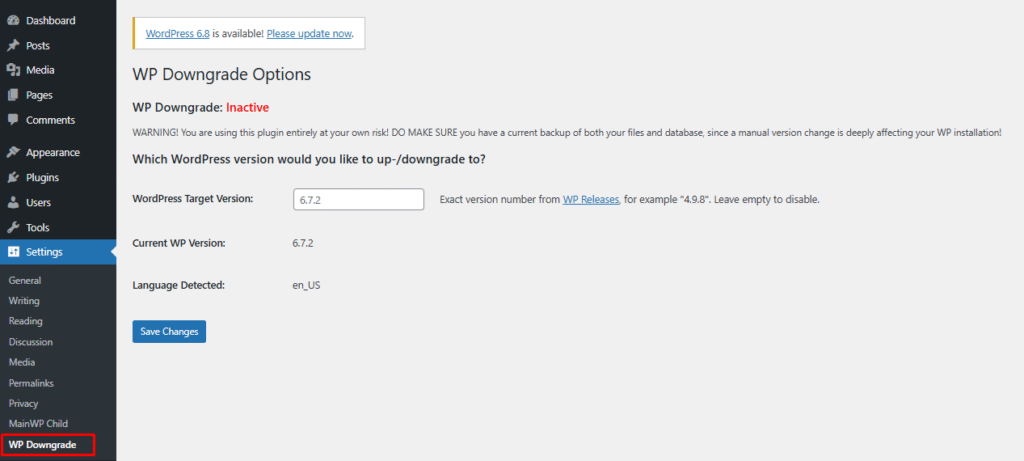
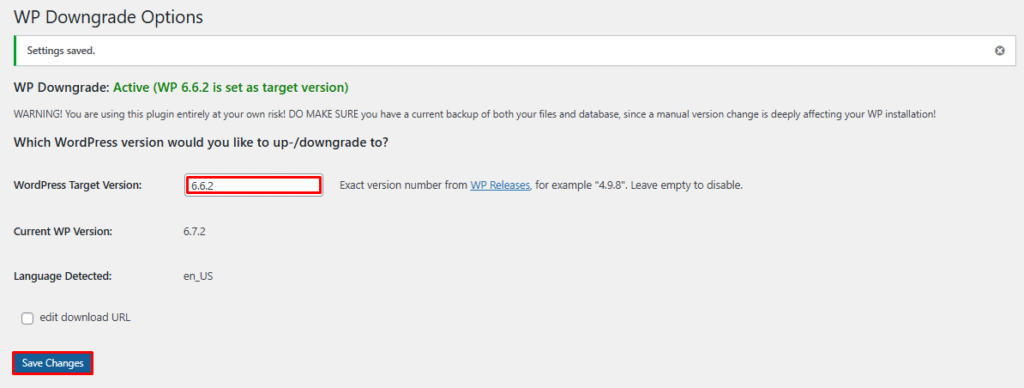
- Enter your target WordPress version in the provided field
- Save changes
- Go to Dashboard → Updates
- Click “Re-install Now” to downgrade to your specified version

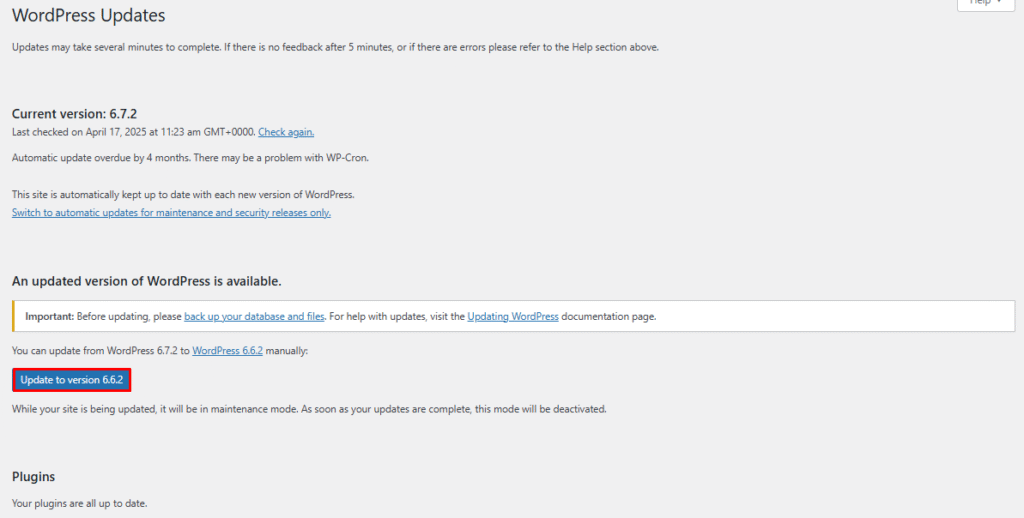
The plugin will handle the downgrade process, but you should still have a backup beforehand as a safety measure.
Method#3: Restoring a Backup To Downgrade WordPress Version
The safest and most reliable method is restoring from a backup made before the problematic update:
- Access your backup solution (hosting backup services or plugin like Duplicator, UpdraftPlus, etc.)
- Select a backup from before the WordPress update
- Follow your backup tool’s restoration process
- Verify that your site is functioning correctly after restoration
This method ensures your site returns exactly to its previous working state without manual file manipulations or potential errors.
RollBack Plugin and Theme Updates
Sometimes the issue isn’t with WordPress core but with a specific plugin or theme update.
Method#1: Manually Rollback WordPress Plugin and Theme Version
To manually roll back a plugin:
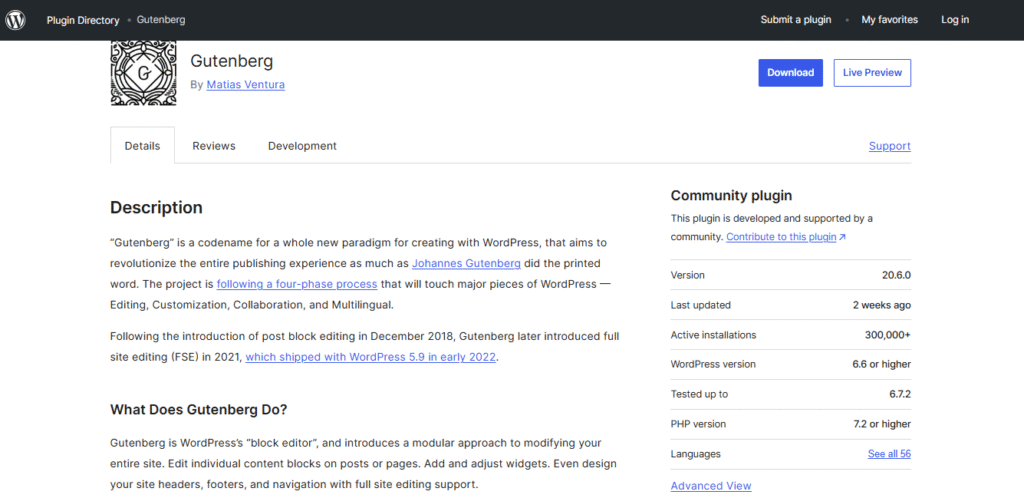
- For plugins from WordPress.org, visit the plugin page and click “Advanced View.”
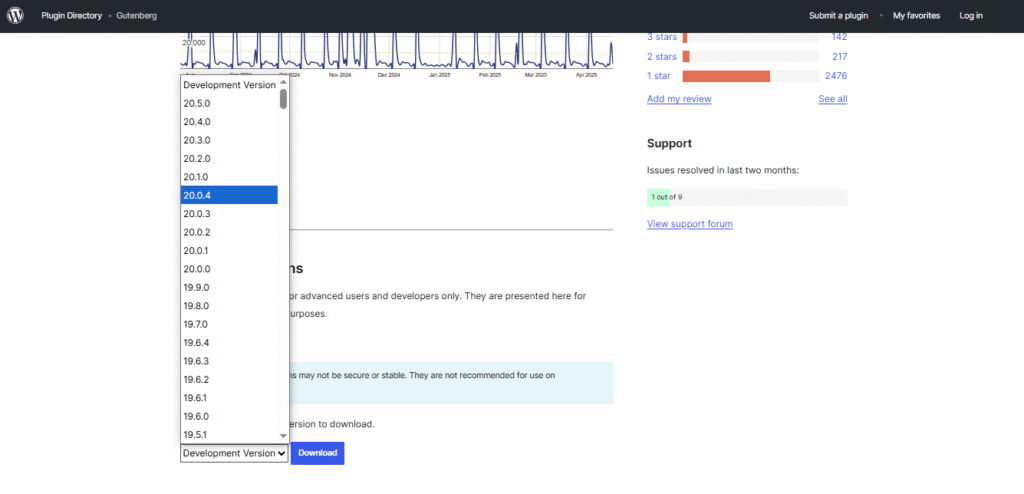
- Scroll down to find previous versions and download the one you need.
- For premium plugins, check your purchase account or contact the developer for older versions.
- Deactivate the problematic plugin in your WordPress dashboard.

- Now, from CPanel, open the file manager.
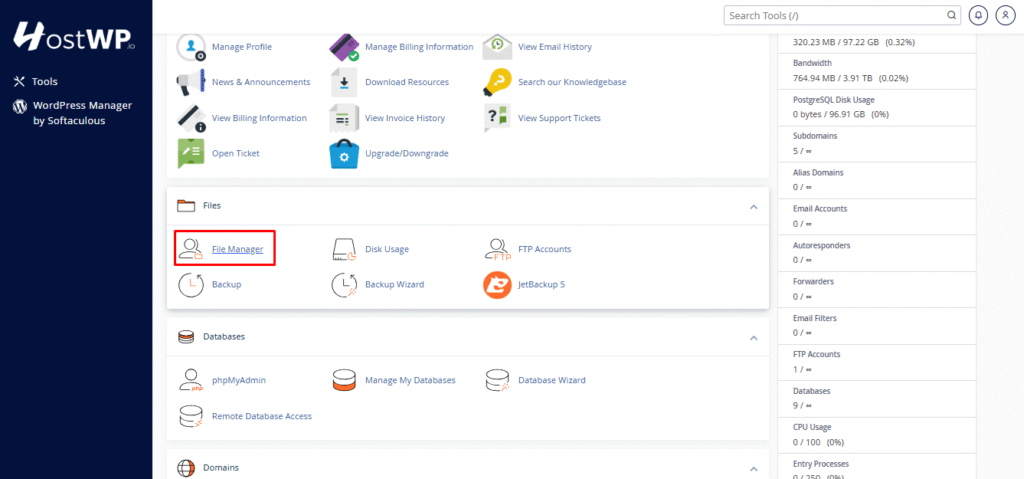
- Rename the current plugin folder (e.g., from plugin-name to plugin-name-backup)
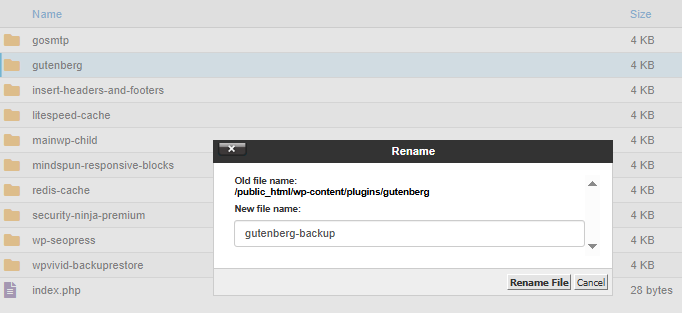
- Upload the older version to your plugins directory and extract it, or directly upload it from the WordPress dashboard.
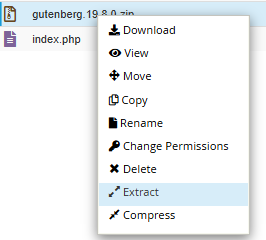
- Reactivate the plugin from your WordPress dashboard.

The plugin is successfully rolled back to your desired version.
To manually roll back a theme:
- Obtain the previous version of your theme
- Back up your current theme’s folder
- Switch to a default WordPress theme temporarily
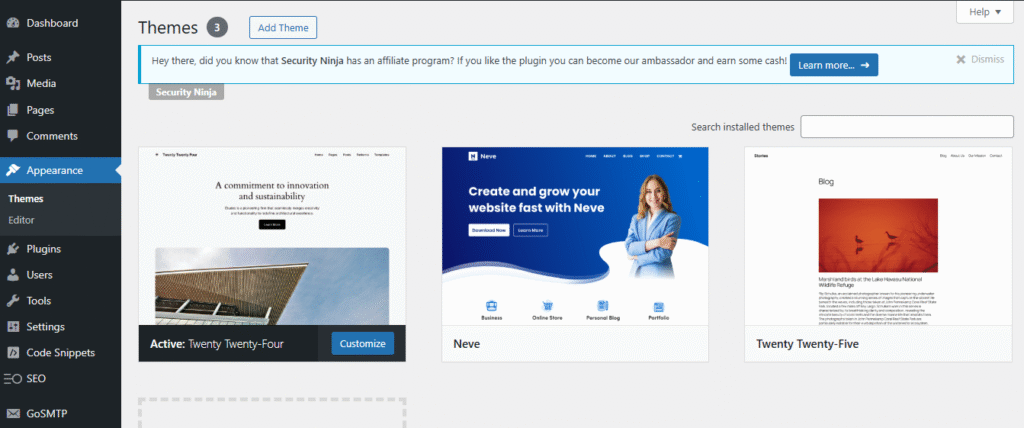
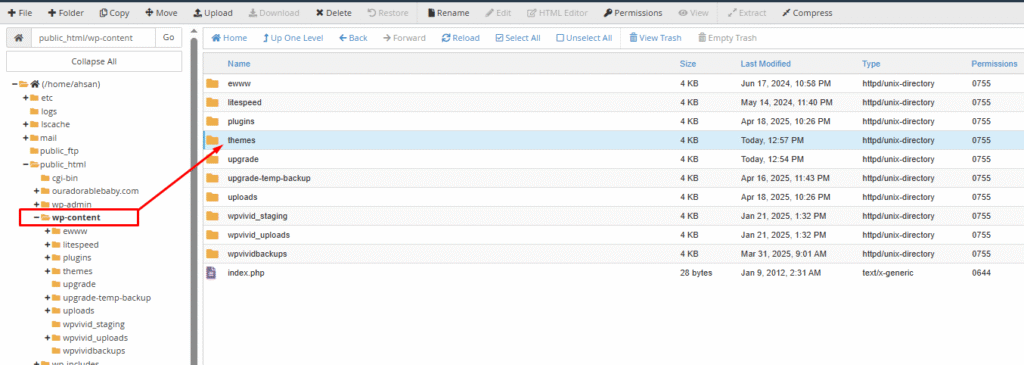
- Now, from CPanel, open the file manager.
- Navigate to wp-content/themes/
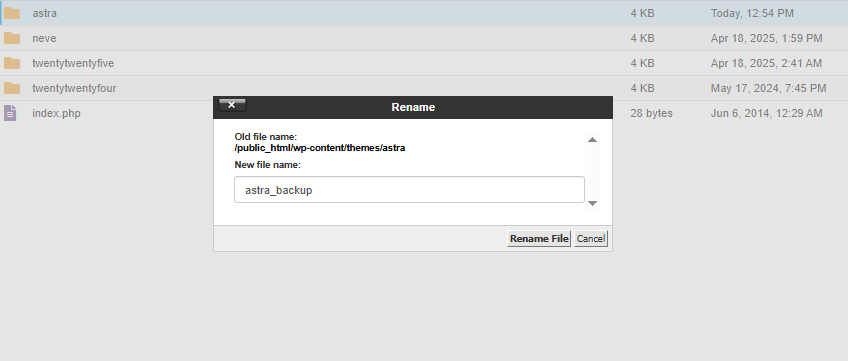
- Rename your current theme folder (e.g., from my-theme to my-theme-backup)
- Upload the older version and extract it in the themes directory or directly upload it from the WordPress dashboard.
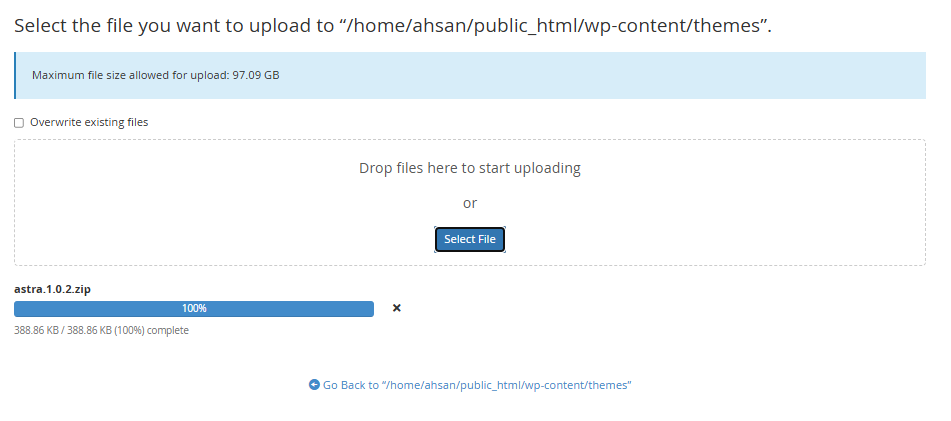
- Reactivate the theme from Appearance → Themes

That’s how we can roll back your theme manually.
Method#2: Using a Plugin To Revert WordPress Plugin and Themes
The WP Rollback plugin offers a user-friendly way to downgrade plugins and themes:
For plugins:
- Install and activate WP Rollback
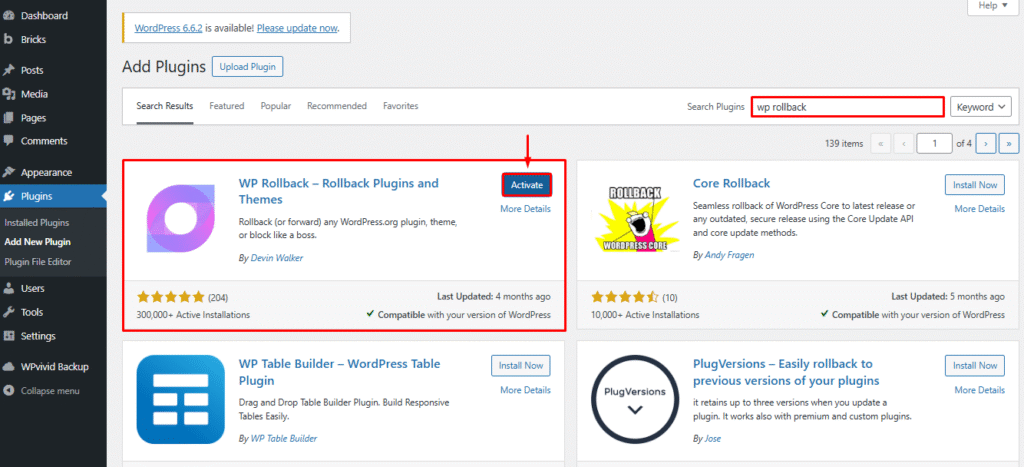
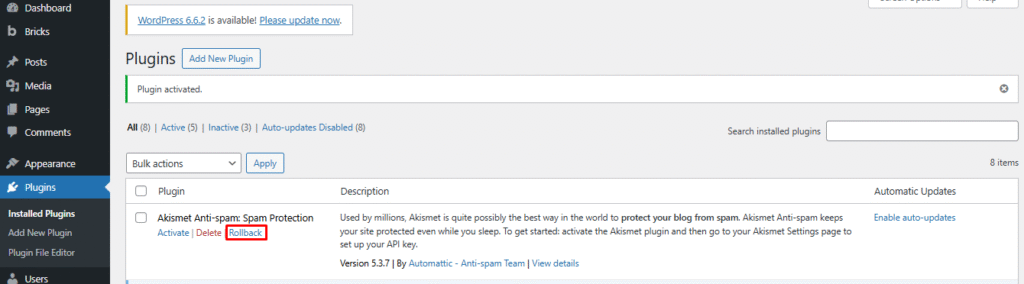
- Go to Plugins → Installed Plugins
- Find the plugin you want to downgrade
- Click on the “Rollback” link that appears under the plugin
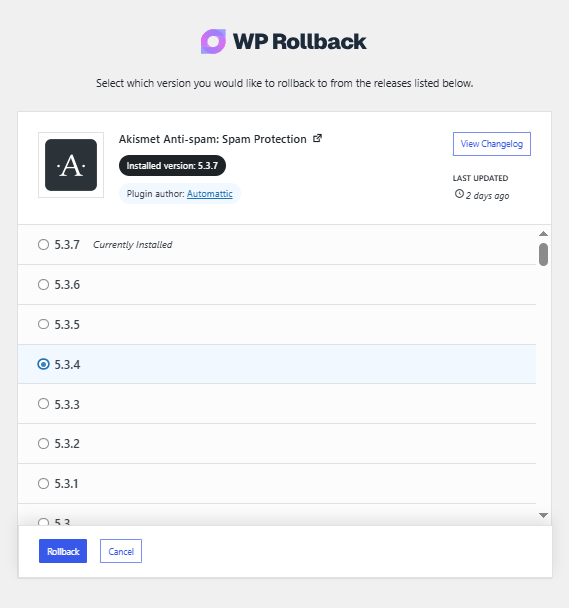
- Select the version you want to revert to
- Confirm and complete the rollback process
To Rollback themes to the Previous Version Using a Plugin:
- Go to Appearance → Themes
- Click on your active theme

- Look for the “Rollback” button in the theme details panel.
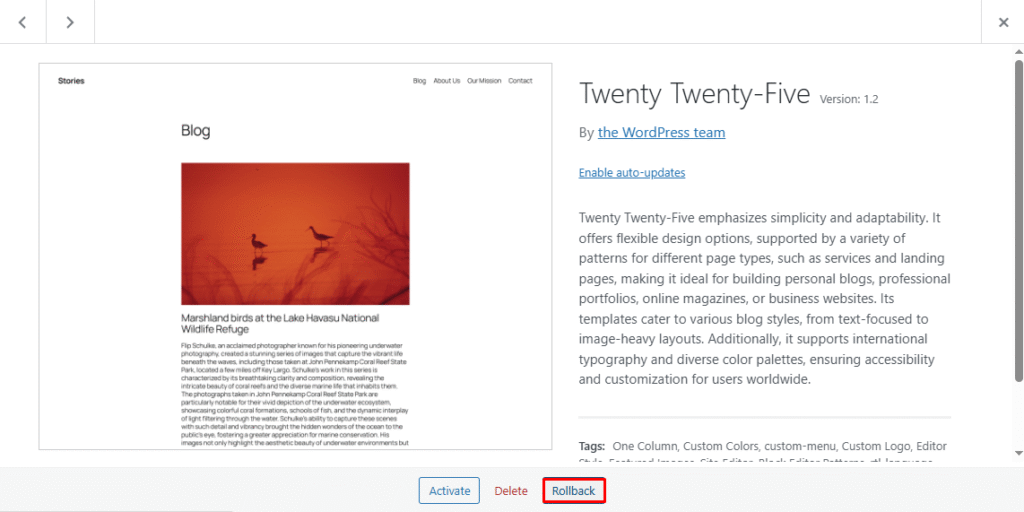
- Select your desired previous version.
- Confirm the rollback
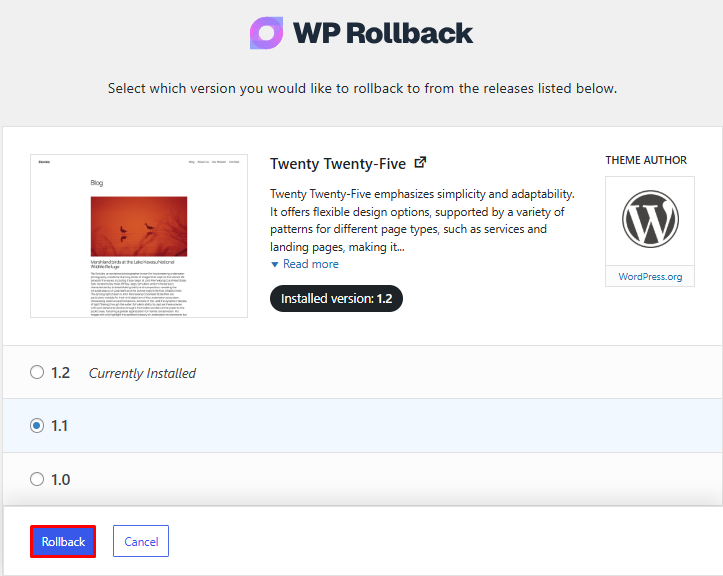
Note: WP Rollback only works with plugins and themes from the WordPress repository. For premium products, you’ll need to use the manual method.
Conclusion
While updating WordPress core, plugins, and themes is generally recommended for security and performance reasons, knowing how to roll back when issues arise is an essential skill for website management.
Remember that downgrading should always be a temporary measure while you find more permanent solutions. After rolling back, focus on identifying the root cause of compatibility issues, contact developers about bugs, and seek alternatives for abandoned software.
When it’s time to update again, use a staging environment to test changes before implementing them on your live site. This proactive approach helps prevent issues while allowing you to benefit from the latest WordPress features and security enhancements.