When running a busy online store, the default WooCommerce order emails do not always provide enough context. You might need to see critical details right inside your inbox to fulfill an order correctly.
Whether it is a custom delivery date, a gift message, or a customer’s VAT number, getting this data into your notification emails saves precious time. It completely eliminates the need to constantly look up orders inside your dashboard.
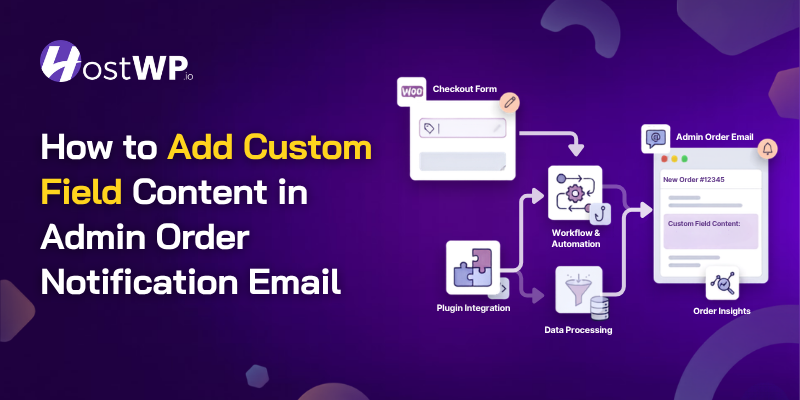
In this developer-friendly guide, we will look at how to add a custom field to WooCommerce admin order email notifications using three methods: clean PHP code snippets, HostWP File Manager overrides, and dedicated plugins.
Why Default WooCommerce Emails Fall Short
By default, WooCommerce only includes standard order data like the billing address, shipping method, and product table in its emails. It completely ignores any custom fields you have added to your checkout page.
This lack of flexibility forces store managers to bounce back and forth between their email clients and the WordPress admin area. This extra step slows down order processing and increases the chances of manual mistakes.
By mapping your custom checkout fields directly into your email templates, you can streamline your entire warehouse workflow. Your team gets all the necessary data in a single, automated notification.
Method 1: Handling Fields and Emails Using Dedicated Plugins (No-Code Route)
If you are a store operator who prefers using plugins over handling direct script assets, a dedicated settings workflow is your safest and most reliable pathway.
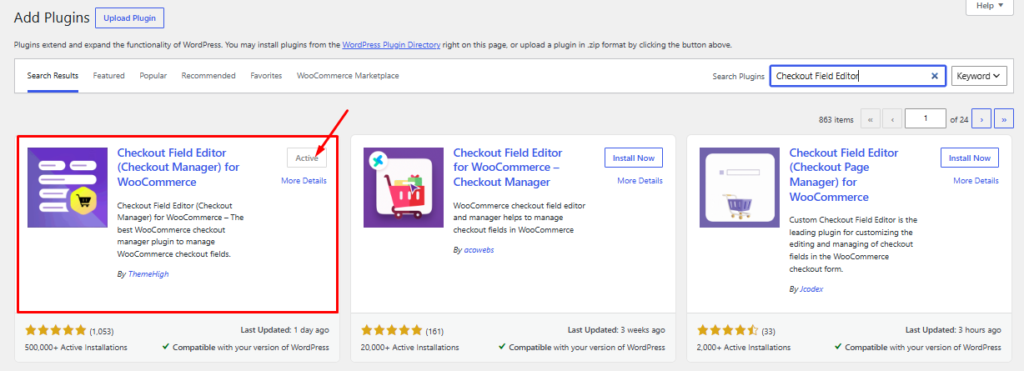
Step 1: Install Checkout Field Editor
Navigate to Plugins > Add New inside your site admin dashboard area. Search for the highly dependable free plugin “Checkout Field Editor” authored by ThemeHigh.
Click Install Now, wait for the system file extraction download to finish processing, and click Activate.
Step 2: Build the New Field and Set Its Key
Go to your sidebar dashboard path WooCommerce > Checkout Form. Click on the blue + Add Field option button positioned directly above the default row item rows tracking grid.
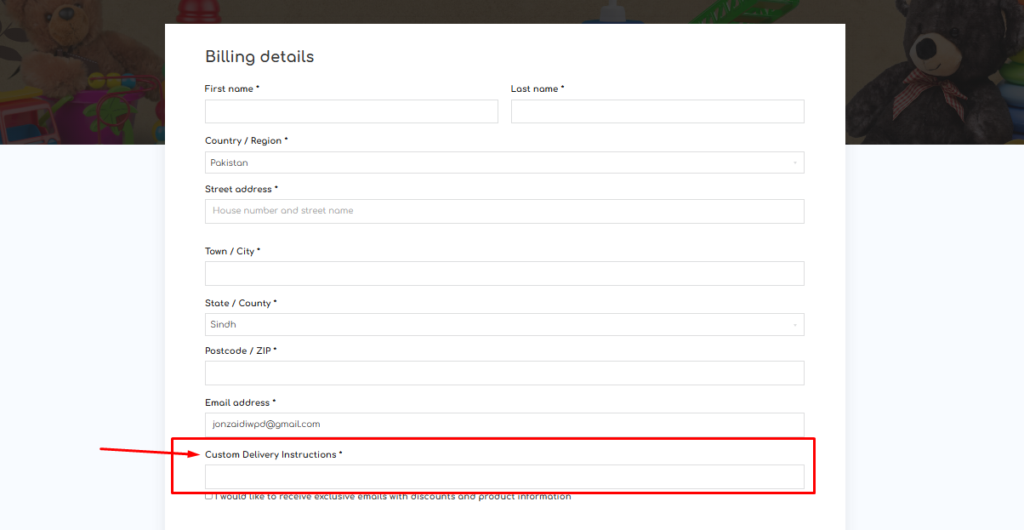
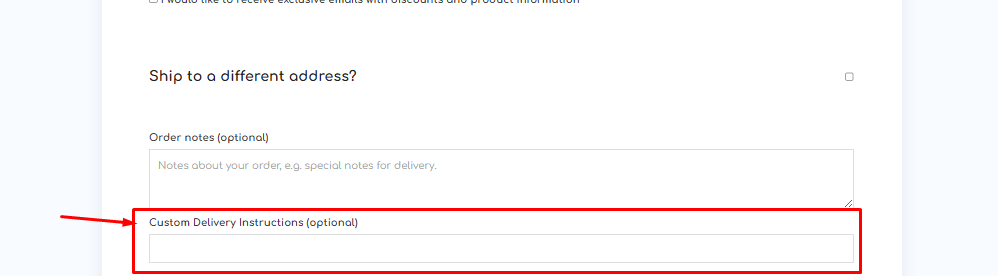
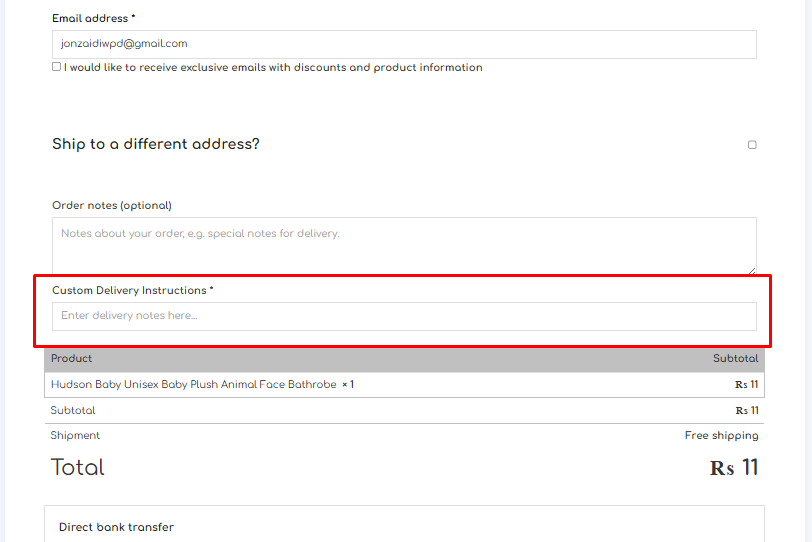
Inside the configuration popup menu window modal, configure your text properties precisely: Set Type to Text, declare your database key name as _my_custom_checkout_field, and input your readable layout title. E.g., in this tutorial we are setting a label for our custom field as “Custom Delivery Instructions”.
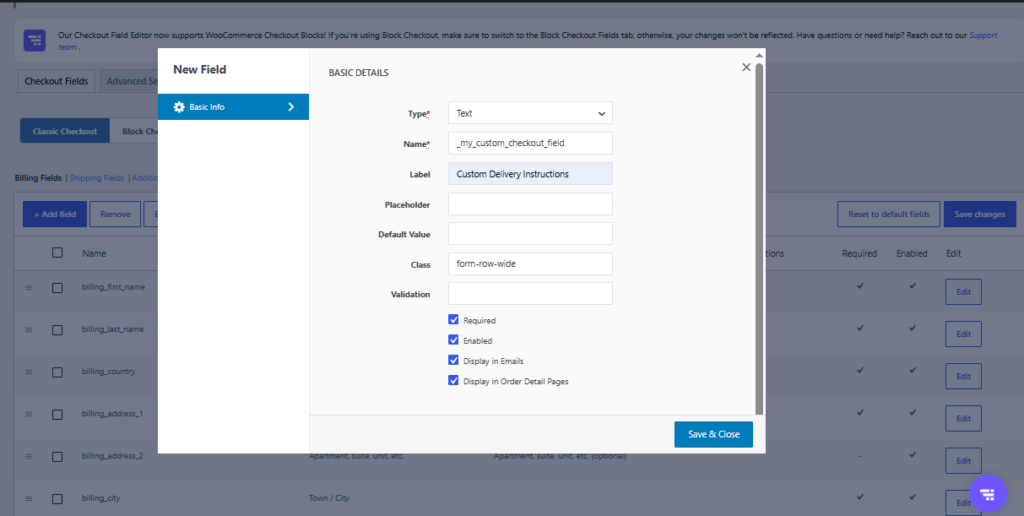
Step 3: Disable “Display in Emails” for Validation Check
make sure the automatic “Display in Emails” option checkbox stays completely unticked and blank initially.
Click the blue Save & Close button in order to display our newly created custom field on our WooCommerce checkout page.

Method 2: Creating and Displaying the Field via HostWP File Manager Overrides
If you prefer modifying core template systems to achieve absolute control over your visual design layout, you can handle both the creation and email styling via structural theme code overrides.
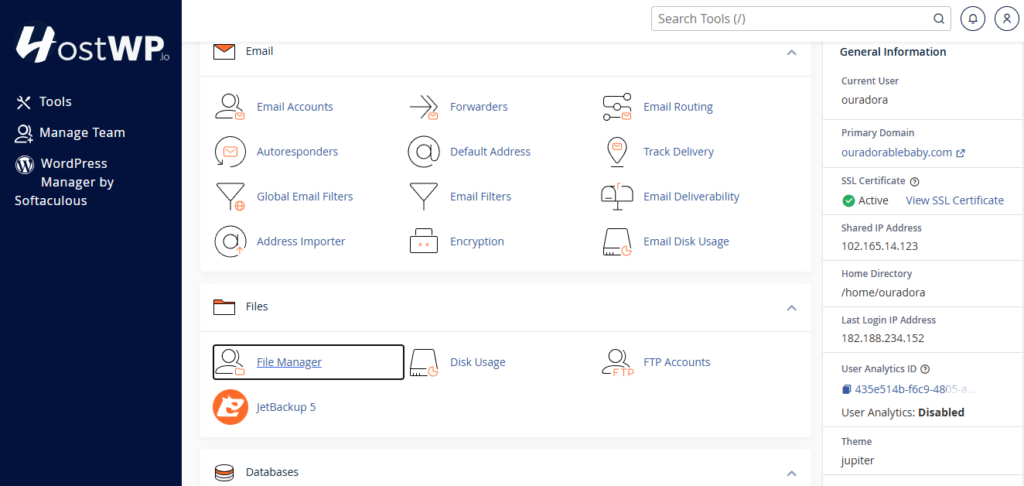
Step 1: Open the HostWP File Manager
Log into your central HostWP Dashboard and click on your website instance to manage its files. Locate and click on the built-in HostWP File Manager icon to open your directory grid.
Step 2: Add Custom Code to Create and Save the Field
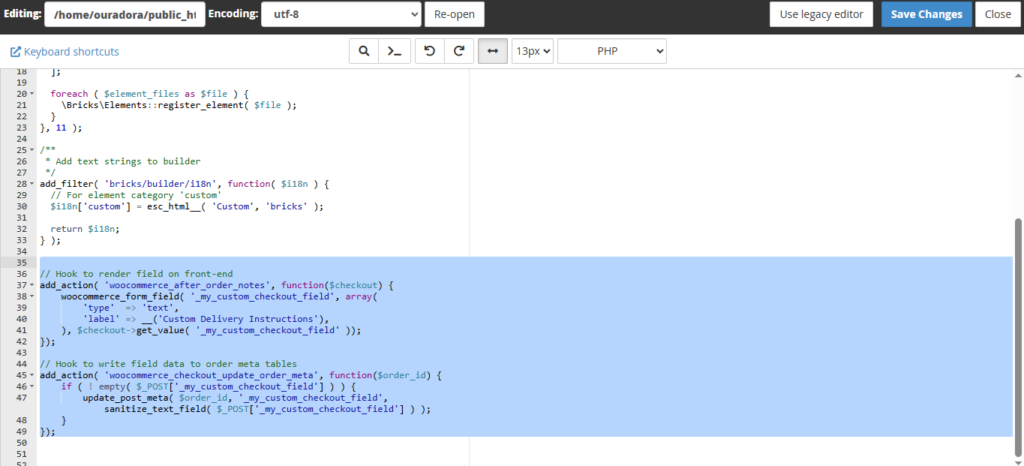
Double-click your child theme folder inside the directory and open your functions.php file using the built-in file text editor.
Paste the following code to manually register, render, and securely save your incoming custom field data straight into your WordPress core database:
PHP
// Hook to render field on front-end
add_action( ‘woocommerce_after_order_notes’, function($checkout) {
woocommerce_form_field( ‘_my_custom_checkout_field’, array(
‘type’ => ‘text’,
‘label’ => __(‘Custom Delivery Instructions’),
), $checkout->get_value( ‘_my_custom_checkout_field’ ));
});
// Hook to write field data to order meta tables
add_action( ‘woocommerce_checkout_update_order_meta’, function($order_id) {
if ( ! empty( $_POST[‘_my_custom_checkout_field’] ) ) {
update_post_meta( $order_id, ‘_my_custom_checkout_field’, sanitize_text_field( $_POST[‘_my_custom_checkout_field’] ) );
}
});
Step 3: Copy Core WooCommerce Email Template File
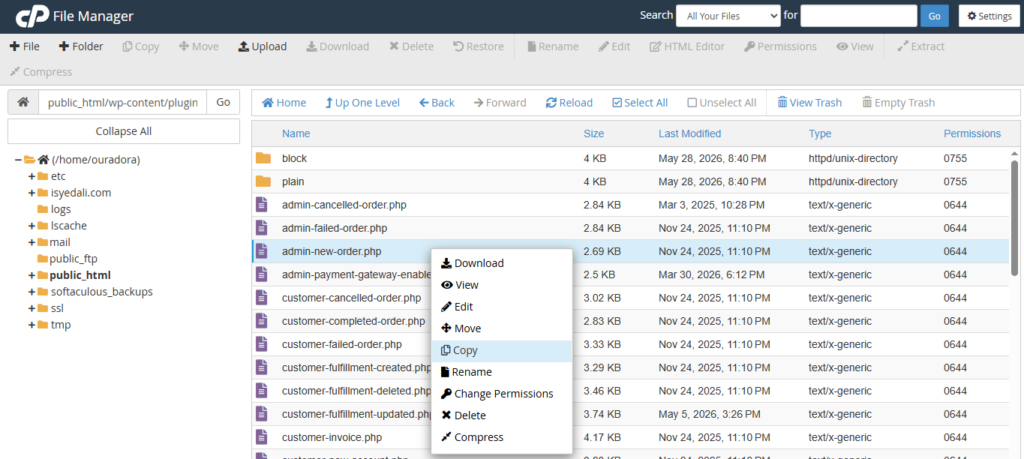
Now, navigate over to the following plugin directory path inside your file view table layout: /wp-content/plugins/woocommerce/templates/emails/.
Locate the file called admin-new-order.php. Right-click on it and choose Copy to duplicate the underlying notification architecture canvas.
Step 4: Create the Child Override Path and Inject HTML Rows
Navigate back to your child theme root folder directory space and build a fresh folder path structure exactly like this: /woocommerce/emails/.
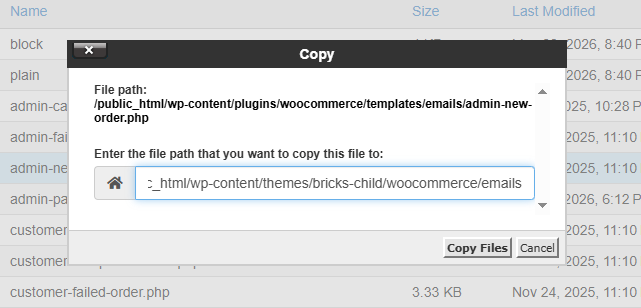
Paste your copied admin-new-order.php file inside this spot and open it to edit. Drop down below the main itemized invoice loops and add a dedicated raw HTML table row to display your field data:
PHP
<tr>
<th class=”td” scope=”row” colspan=”2″ style=”text-align:left;”>Delivery Notes:</th>
<td class=”td” style=”text-align:left;”><?php echo esc_html( $order->get_meta(‘_my_custom_checkout_field’) ); ?></td>
</tr>
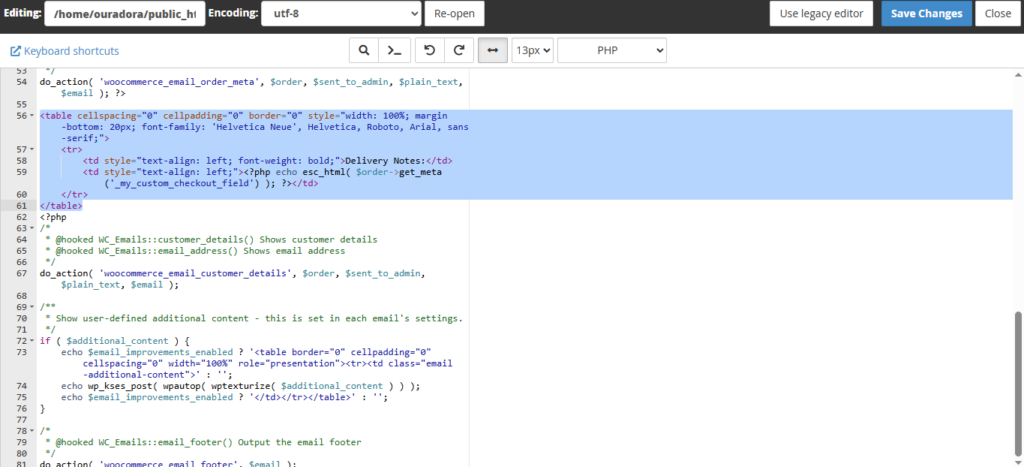
Save the file changes. WooCommerce will now completely ignore the default plugin view layer and pull your custom child layout modifications whenever an admin notification fires.
Method 3: Creating and Displaying the Field via PHP Hooks
This method is entirely code-based. We will use one PHP snippet to inject a custom field onto the checkout page, and a second PHP snippet to read that field and display it inside the admin notification email.
Expert Advice: Before making any changes to your website code, make sure you have a full backup of your WooCommerce website that is easy to restore if anything goes wrong.
Step 1: Access Your Code Snippets Tool
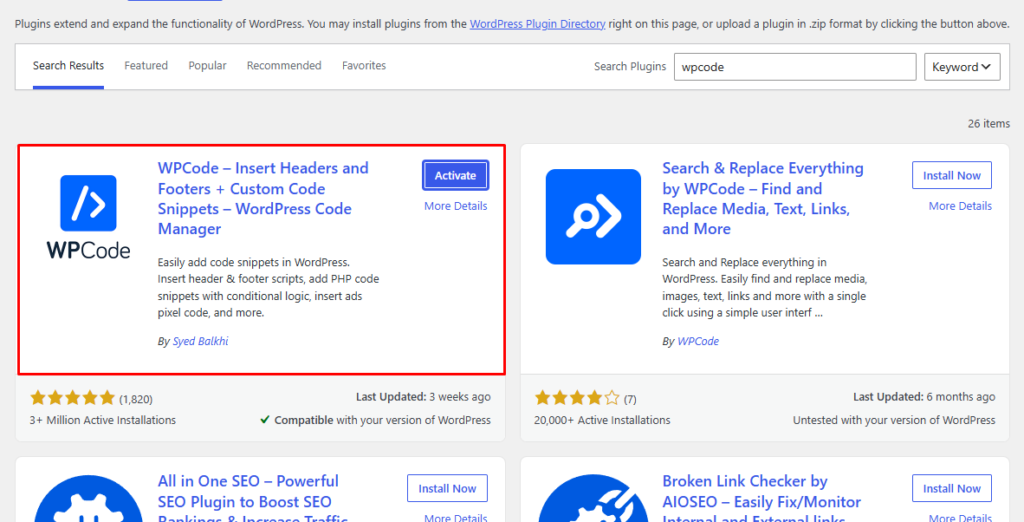
Log in to your WordPress admin dashboard and navigate to your code management area. We highly recommend using a plugin like Code Snippets or WPCode for this process.
Make sure you have a child theme active so your additions do not get deleted when your parent theme undergoes an update.
Step 2: Paste Code to Create the Checkout Field
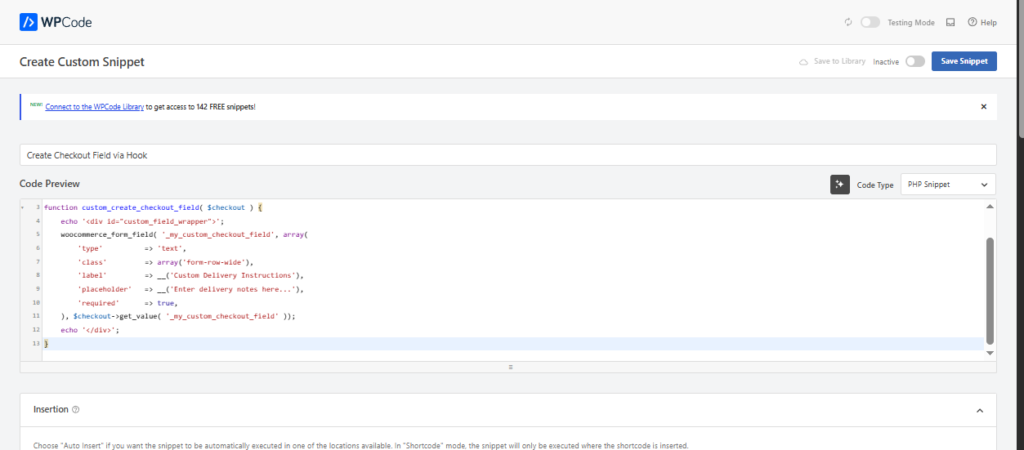
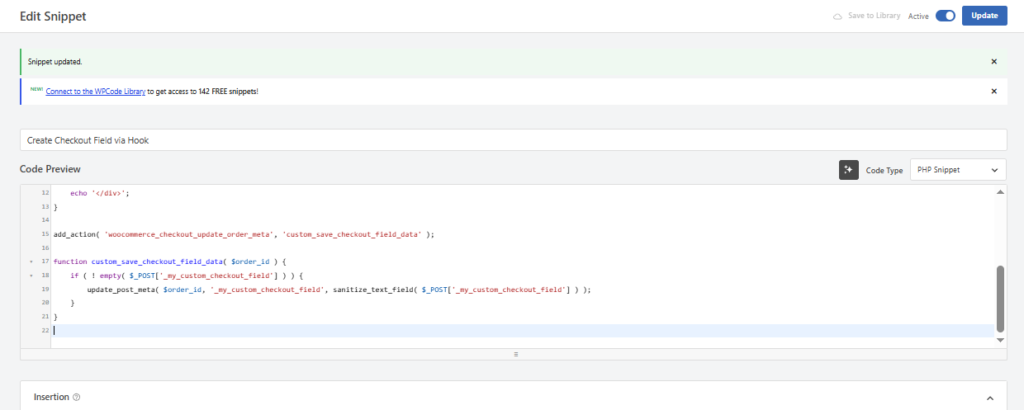
Create a new snippet titled “Create Checkout Field via Hook” and paste the following PHP script to display a custom input box on your checkout form page:
PHP
add_action( ‘woocommerce_after_order_notes’, ‘custom_create_checkout_field’ );
function custom_create_checkout_field( $checkout ) {
echo ‘<div id=”custom_field_wrapper”>’;
woocommerce_form_field( ‘_my_custom_checkout_field’, array(
‘type’ => ‘text’,
‘class’ => array(‘form-row-wide’),
‘label’ => __(‘Custom Delivery Instructions’),
‘placeholder’ => __(‘Enter delivery notes here…’),
‘required’ => true,
), $checkout->get_value( ‘_my_custom_checkout_field’ ));
echo ‘</div>’;
}
Step 3: Paste Code to Save the Field Data
Add this function below your existing code to validate and save the customer’s input when they click buy.
PHP
add_action( ‘woocommerce_checkout_update_order_meta’, ‘custom_save_checkout_field_data’ );
function custom_save_checkout_field_data( $order_id ) {
if ( ! empty( $_POST[‘_my_custom_checkout_field’] ) ) {
update_post_meta( $order_id, ‘_my_custom_checkout_field’, sanitize_text_field( $_POST[‘_my_custom_checkout_field’] ) );
}
}
Step 4: Paste Code to Inject Data Into Admin Emails
Now, add the final hook block to intercept the incoming backend notifications and print your custom field data cleanly under the main items breakdown list table:
PHP
add_action( ‘woocommerce_email_order_meta’, ‘custom_add_field_to_admin_email’, 10, 4 );
function custom_add_field_to_admin_email( $order, $sent_to_admin, $plain_text, $email ) {
if ( $sent_to_admin && ‘new_order’ === $email->id ) {
$custom_field_value = $order->get_meta( ‘_my_custom_checkout_field’ );
if ( ! empty( $custom_field_value ) ) {
echo ‘<p><strong>Custom Delivery Instructions:</strong> ‘ . esc_html( $custom_field_value ) . ‘</p>’;
}
}
}
Click the Save Changes and Activate button in WPCode to run the entire automated sequence live. Run a test order to verify the text appears seamlessly inside your inbox.
| Method | Technical Skill | Layout Flexibility | Best For |
| PHP Hook (Method 1) | Medium | Standard Text | Quick text additions |
| HostWP File Manager Override (Method 2) | High | Fully Custom HTML | Advanced layouts & tables |
| Dedicated Plugins (Method 3) | Low | Automated Layout | Non-tech store owners |
In short, bringing custom checkout fields right into your WooCommerce admin emails is a massive time-saver for order fulfillment. Whether you prefer the quick efficiency of PHP hooks, the deep design control of HostWP File Manager template overrides, or the simple click-and-go ease of a plugin, just ensure your database meta keys match perfectly.
Setting up your email layout this way gives you full control over your e-commerce data pipeline. It puts an end to endless dashboard checking and ensures your warehouse or delivery team always has the exact notes they need to pack orders correctly!
If you want to ensure your automated emails and database lookup queries fire instantly at checkout without lagging, consider migrating your store to a high-performance cluster like HostWP’s Optimized WooCommerce Infrastructure.