The checkout page is the most critical part of your entire e-commerce store. It is the final bridge between a casual browser and a paying customer.
If your checkout page is clunky, slow, or asks for too much unnecessary information, people will simply leave. This is known as cart abandonment, and it costs store owners billions of dollars every year.
Fortunately, learning how to edit checkout page in WooCommerce is not as difficult as it sounds. In this guide, we will look at how to customize WooCommerce checkout page using blocks, plugins, templates, and custom code.
Why Customizing Your Checkout Page is Critical for Sales
Before we dive into the technical tutorials, let’s look at why optimizing this specific page matters so much. A standard checkout page is often not built for high conversions.
- Reduces Cart Abandonment: A clean, minimal checkout layout removes distractions and keeps the user focused on finishing the payment.
- Builds Trust: By adding security badges, customer testimonials, and clear return policies, you make the customer feel safe sharing their credit card details.
- Saves Time for the Customer: Removing unnecessary fields (like “Company Name” for a standard consumer store) makes the checkout process much faster.
- Boosts Average Order Value: You can use the checkout page to offer last-minute order bumps or cross-sell related products right before they click buy.
If you are planning to run complex promotions and want to push bulk deals before they pay, make sure to check out our complete guide on how to set up quantity discounts in WooCommerce.
Method 1: Editing the New WooCommerce Checkout Block (No Plugins)
In recent years, WooCommerce introduced a highly modern, block-based checkout system, that is editable via the built-in Gutenberg block editor. WooCommerce is moving toward block-based checkout as the recommended default for new stores
If your store is running the modern Block Checkout, you do not need any coding knowledge or external plugins to make visual edits.
Step-by-Step Procedure:
- In your WordPress dashboard, navigate to Pages > All Pages and look for the page titled Checkout.
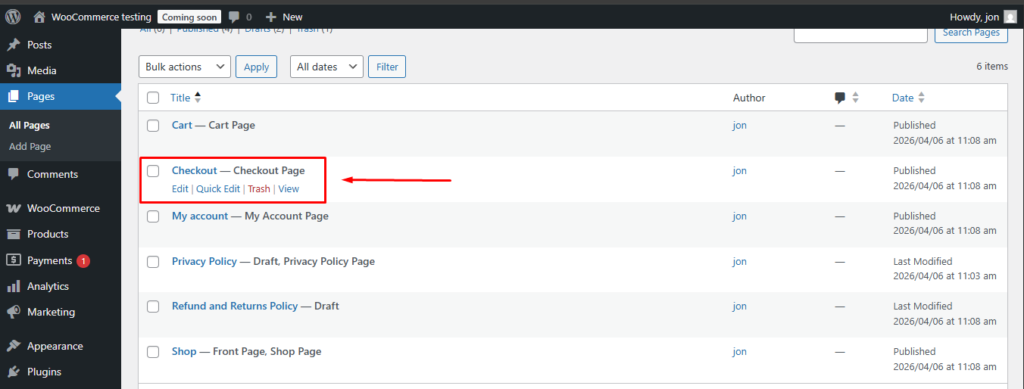
- Click Edit to open the Gutenberg block editor interface for that specific page.
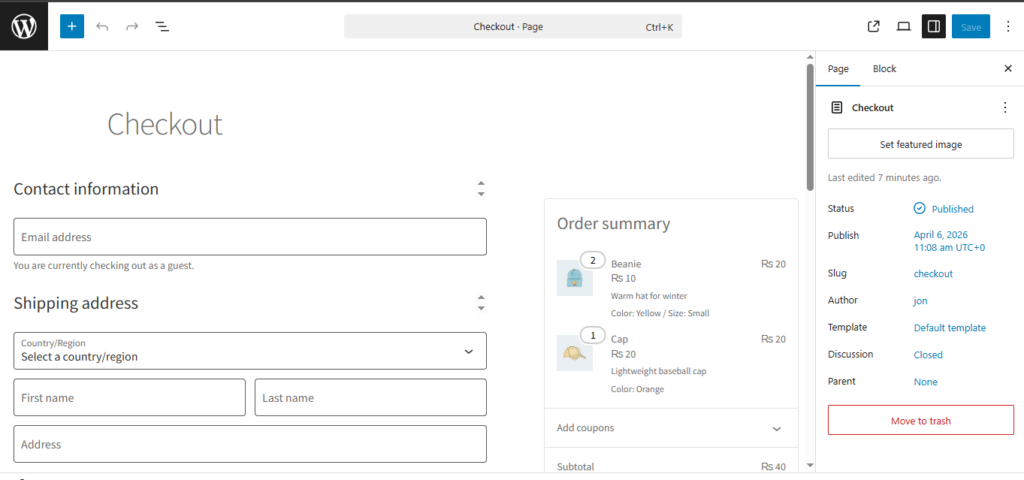
- You will see the entire checkout layout rendered as a single, smart WooCommerce block on your screen.
- Click on specific sections, like the “Billing Address” or “Shipping Methods,” to reveal the customization settings in the right-hand sidebar.
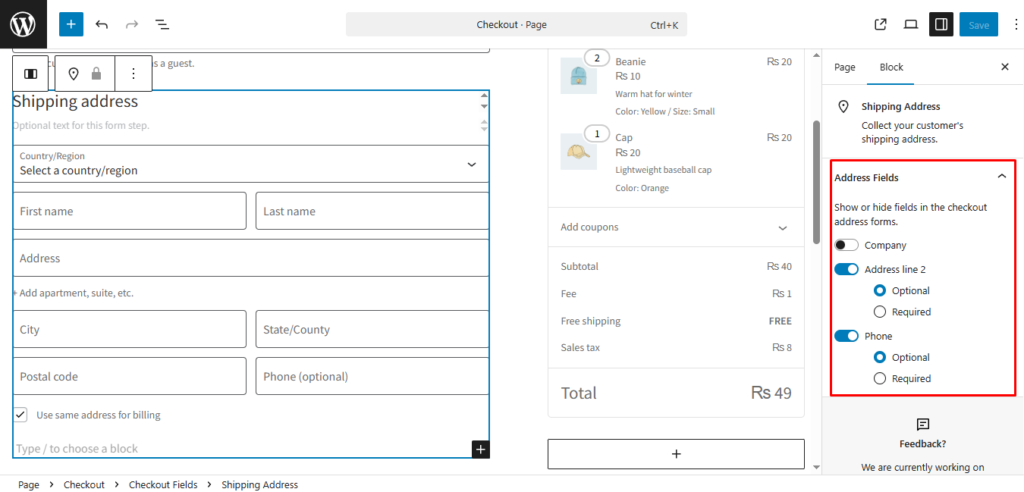
- In the sidebar, you can toggle options to hide or require fields like the phone number and company name.
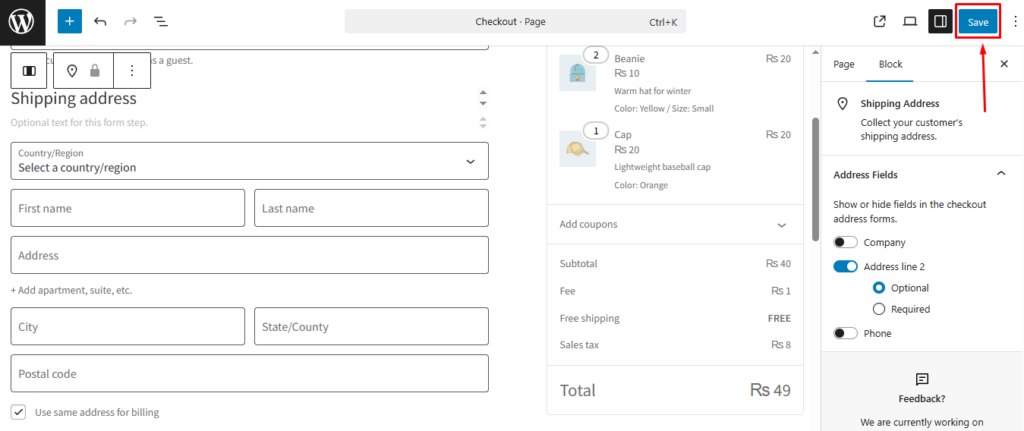
- Once you are happy with the clean layout, click the blue Update button at the top right to save your changes.
Method 2: Using the “Checkout Field Editor” Plugin (The Easiest Route)
If your store is still using the classic shortcode-based checkout page, or if you need to add custom fields, the Block editor might not be enough.
To add new fields like “How did you hear about us?” or a gift message box, using a dedicated field editor plugin is the absolute best route.
The Best Plugin for the Job
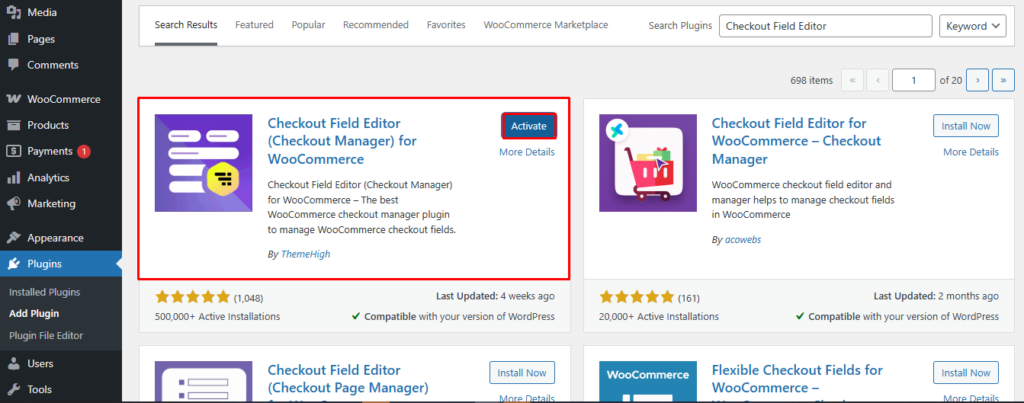
We highly recommend using the free “Checkout Field Editor (Checkout Manager)“ by ThemeHigh. It is one of the most popular and highly-rated free options in the WordPress directory.
This plugin allows you to map your custom fields directly to your WooCommerce product fields using an easy step-by-step wizard.
Step-by-Step Procedure:
- Go to Plugins > Add New, search for “Checkout Field Editor by ThemeHigh”, and install the free version.
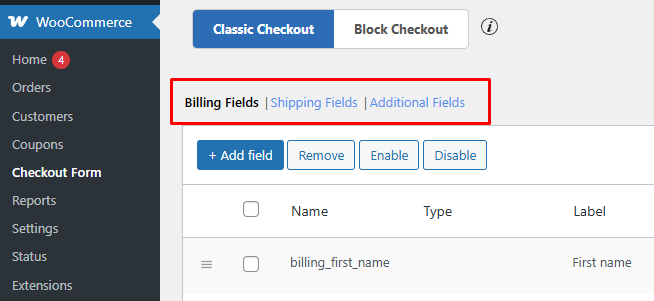
- Once activated, navigate to your sidebar and click on WooCommerce > Checkout Form.
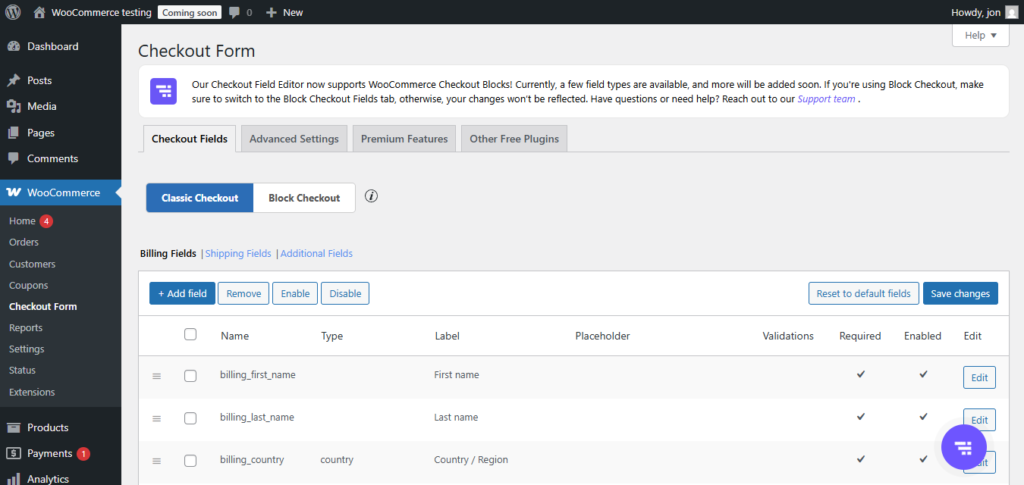
- You will see three tabs at the top: Billing Fields, Shipping Fields, and Additional Fields.
- To remove a field, simply check the box next to it (like “Billing Address 2”) and click the Disable button.

- To add a new field, click the Add Field button at the top of the table grid.
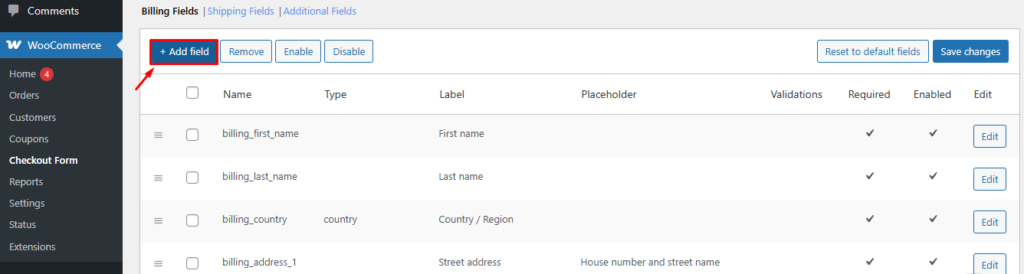
- Choose the field type (Text, Dropdown, Radio, Checkbox), give it a label, and click Save and Close.

Method 3: Customizing the Checkout Page with Custom Coding (For Developers)
If you are a developer and do not want to install extra plugins that might slow down your database, you can use WooCommerce PHP hooks.
WooCommerce provides powerful action and filter hooks that allow you to strip away or add fields directly from your child theme’s functions.php file.
How to Remove Fields via Code
To remove fields like the company name or the second address line, you can use the WooCommerce_checkout_fields filter hook.
Here is a clean code snippet you can paste into your child theme to remove unnecessary billing fields instantly:
PHP
add_filter( ‘WooCommerce_checkout_fields’ , ‘custom_override_checkout_fields’ );
function custom_override_checkout_fields( $fields ) {
unset($fields[‘billing’][‘billing_company’]);
unset($fields[‘billing’][‘billing_address_2’]);
return $fields;
}
How to Add Custom Fields via Code
If you want to add a custom field to capture specific data, you can use action hooks like WooCommerce_after_checkout_billing_form.
This allows you to render custom HTML input fields and save that data directly into the WooCommerce order meta database table.
Method 4: How to Edit the Checkout Template and Layout
If you want to go beyond basic field edits and completely change the visual user experience, you need to customize the layout or template.
The biggest benefit of doing this is turning the boring, default WooCommerce layout into a highly modern “Multi-Step” or “Two-Column” high-converting page.
Option 1: The Gutenberg “Two-Column” Layout (Free)
If your store is running the modern WooCommerce Block Checkout, changing the visual structure is incredibly easy and requires zero coding.
When you click on the main checkout block and check your right-hand settings sidebar, you will see direct toggles for single or double columns.
Switching to a two-column layout keeps the billing fields on the left and locks the order summary on the right, which is a proven e-commerce best practice.
Option 2: Using WooCommerce Template Overrides (For Devs)
If your store is utilizing the classic shortcode checkout and you want massive custom changes, you will need to override the PHP template file.
Using your FTP or cPanel File Manager, navigate to /plugins/WooCommerce/templates/checkout/ and locate the file named form-checkout.php.
Copy this file and paste it into your Child Theme under a custom path: your-child-theme/WooCommerce/checkout/. You can now safely redesign the core HTML without breaking updates.
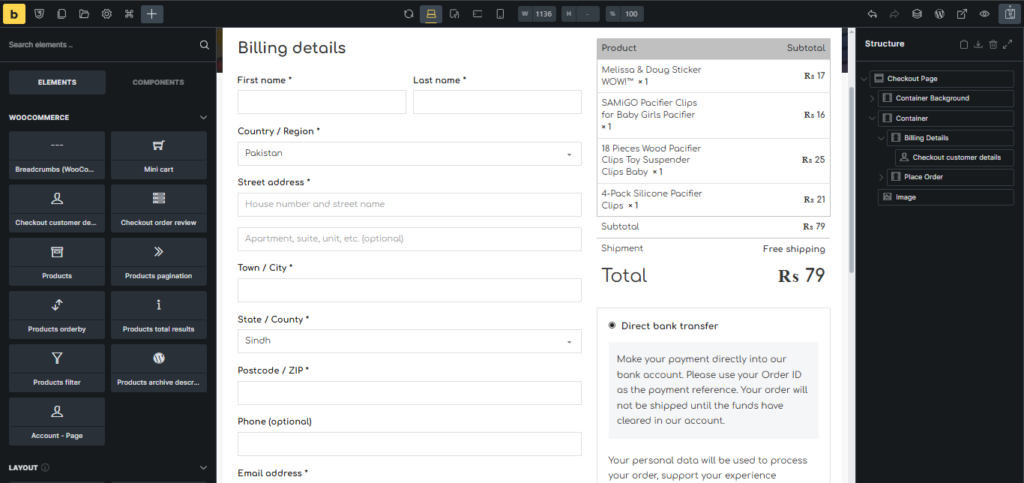
Option 3: Using a Page Builder (Bricks Builder or Elementor)
If you are looking for total layout freedom but do not want to write complex PHP or CSS code, utilizing a modern page builder is your best route.
Advanced builders like Bricks Builder or Elementor Pro provide dedicated, granular checkout widgets that you can drag and drop anywhere on the screen.
You can freely move the payment gateway box above the shipping section, create custom multi-step tabs, and visually control the borders, padding, and colors.
Don’t Let a Slow Server Ruin Your Checkout Conversions
Every edit we discussed today adds processing weight to your checkout page. Plugins run database queries, and the new Block editor requires heavy JavaScript rendering.
If your web hosting is underpowered, editing checkout page WooCommerceWooCommerce will result in high loading times. A slow checkout page is the fastest way to lose a sale.
To ensure your custom checkout fields and beautiful block layouts load instantly without any lag, serve your store on HostWP’s Managed WooCommerce Hosting.
Our platform is fine-tuned specifically to maximize WooCommerce cart and checkout speeds:
- LiteSpeed Enterprise Caching: Bypasses static caching for checkout pages while keeping the server load incredibly low.
- NVMe Storage: Pulls your custom checkout fields and database queries in milliseconds, preventing “Cart Spinners.”
- Advanced Redis Caching: Ensures that real-time tax, shipping, and coupon calculations do not slow down the payment process.
Which Checkout Method Should You Use?
| Feature | Modern Block Editor | Dedicated Plugins | Custom PHP Coding | Page Builders |
| No-Code Friendly | Yes | Yes | No | Yes |
| Custom Fields | No | Yes | Yes | No |
| Layout Overrides | Basic | No | Yes | Complete |
| Performance | High | Medium | High | Medium |
Learning how to customise WooCommerceWooCommerce checkout page is an essential skill for any serious store owner looking to maximize revenue. Start by stripping away the fields you do not need, and watch your conversion rates climb!