
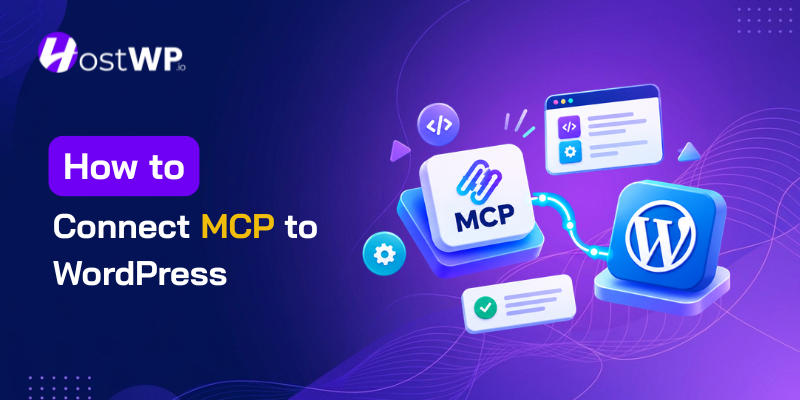
You have probably heard about AI tools like ChatGPT and Claude. They are great at writing text and answering questions. But what if you want them to actually do things on your WordPress website? Like creating a new post, updating a page, or checking your site’s settings?
That is where MCP comes in.
In this guide, I will show you exactly what MCP is, why it matters, and how to connect it to your WordPress site using a simple plugin called WPVibe. I will walk you through each step with screenshots so you can follow along easily.
What is MCP? (In Simple Words)
MCP stands for Model Context Protocol.
Think of it like a universal language that lets AI tools talk to your WordPress site.
Without MCP, AI can only read text you copy and paste to it. With MCP, AI can see your site, read your posts, and even make changes for you through a secure connection.
It is like giving your AI assistant a set of keys to your website, but with strict rules about what it can and cannot do.
Why Should You Care About MCP?
Here are a few real reasons people are using MCP with WordPress:
- Save time: Instead of logging in to make small changes, you can ask AI to do it for you.
- Work faster: AI can pull data from your site and use it to write better content.
- Automate tasks: Create posts, manage comments, or check site health with simple chat commands.
- Stay in control: You decide exactly what the AI can access and what it cannot.
Now let us look at the three best plugins to make this happen.
Why WPVibe?
Several plugins can connect MCP to WordPress. But in this guide, we are using WPVibe, a free plugin made by the team at Awesome Motive.
Here is why:
- It is made specifically for ChatGPT and Claude.
- The setup is very simple (no copying complex code).
- It is free to get started.
- It guides you through every step.
- Works with WordPress plugin capabilities.
If you are new to MCP, this is the best place to start
Step-by-Step Setup Guide
WPVibe is a dedicated, lightweight WordPress MCP server. It does one thing and does it well: it connects AI agents to your site.
Best for: People who want a simple, dedicated MCP connection without extra chatbot features.
Step 1: Install WPVibe
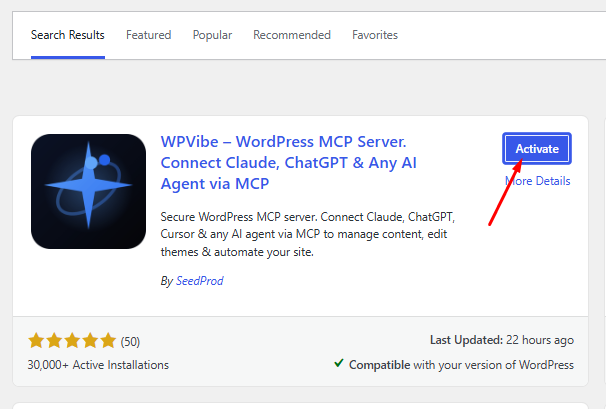
WPVibe is free to download and use from WordPress.org, and you can install it directly from your WordPress dashboard.
WordPress Dashboard>Go to Plugins > Add New. Search for “WPVibe”. Click Install Now and then Activate.
Step 2: Open WPVibe Settings
After activation, you will see a new menu called WPVibe in your sidebar. Click on it.
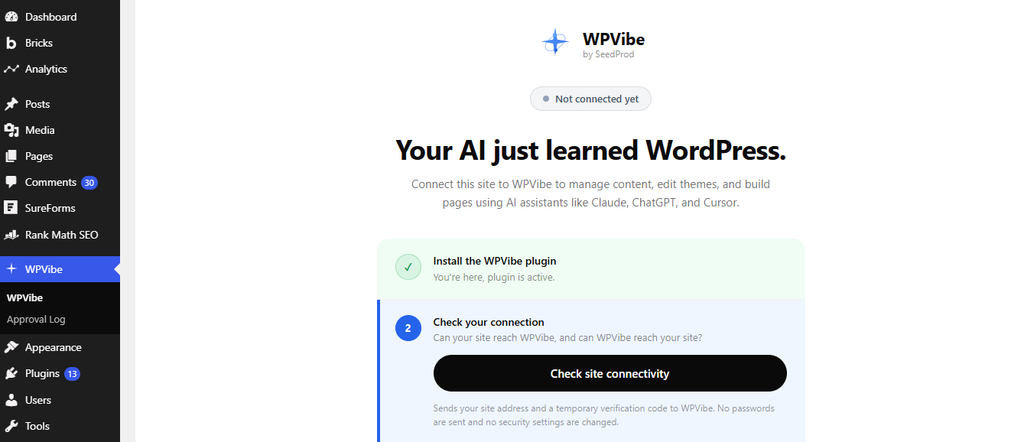
Step 3: Check Your Site Connectivity
On the setup screen, the first step is already marked as done (Install the plugin). Now, look at Step 2: Check your connection.
Click the big black button that says Check site connectivity. This ensures your website can communicate securely with the WPVibe servers. Wait for it to turn green.
Step 4: Connect Your AI Tool
Once the connection is checked, scroll down to Step 3: Add WPVibe to your AI and connect this site.
Here, you do not need to copy and paste complex URLs. You will see direct buttons.
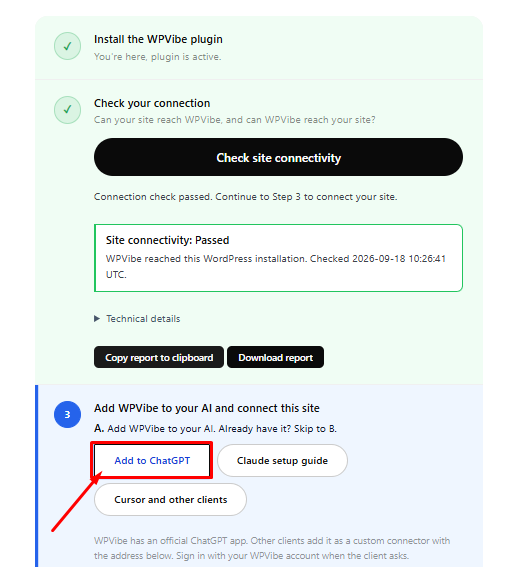
- If you use ChatGPT, click the Add to ChatGPT button. You will be redirected to the ChatGPT screen that will ask you to install the WPVibe plugin.
- If you use Claude, click the Claude setup guide button.
Completing this step gives your AI model access to your WordPress website.
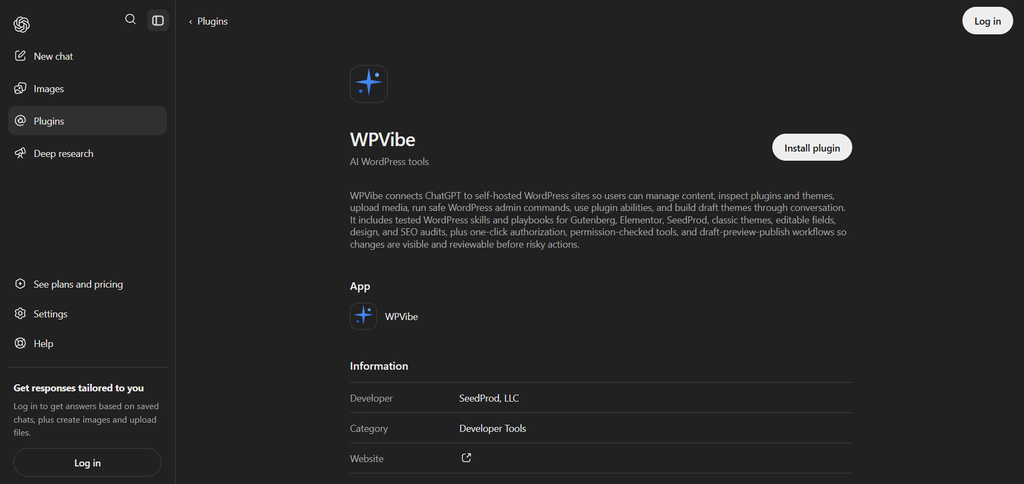
Step 5: Connect your email address
Once the new page opens, it will ask for your email address. Enter your email and submit. The screen will then show a success message saying your primary account is now connected.
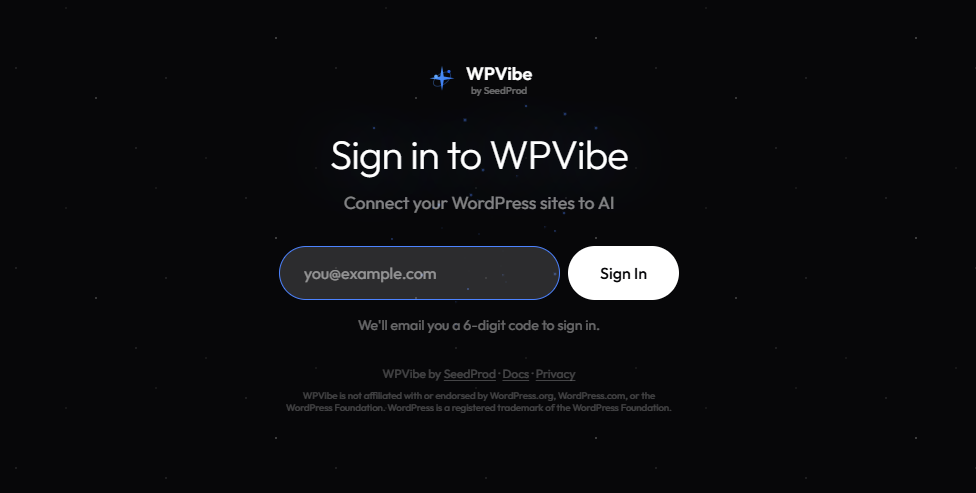
Step 6: Ask your AI to connect your site
Now, go to the chat box in your AI tool and simply type “connect my wordpress site”. The AI will reply with a special link. Click on that link.
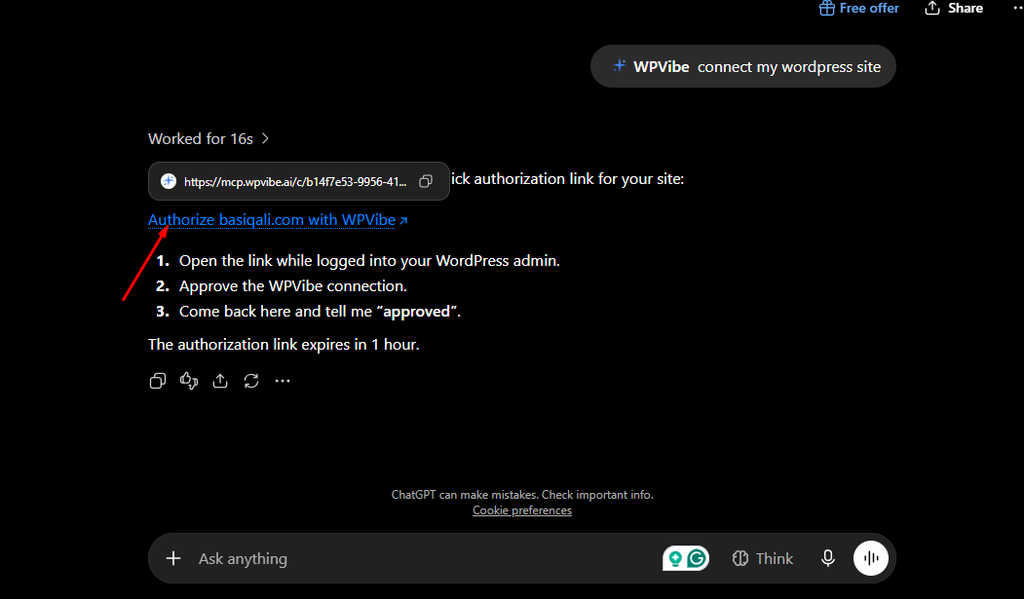
Step 7: Final Approval
Click the link to go to a page that asks you to approve this connection. Just click the approve button once. With that single click, your WordPress site is officially connected to your AI assistant.
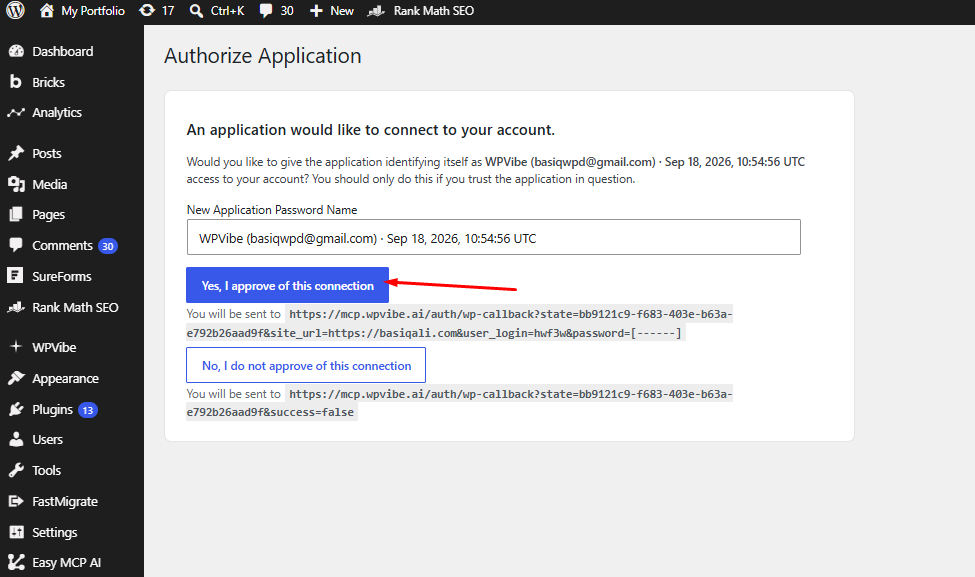
Step 8 : Connection Successful
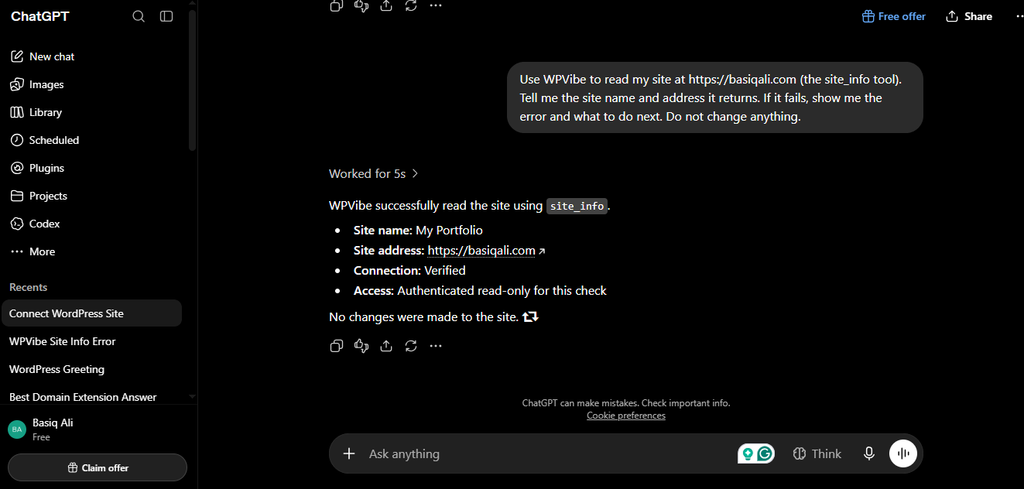
Copy the prompt given by AI to check if this is working well and following your instructions.
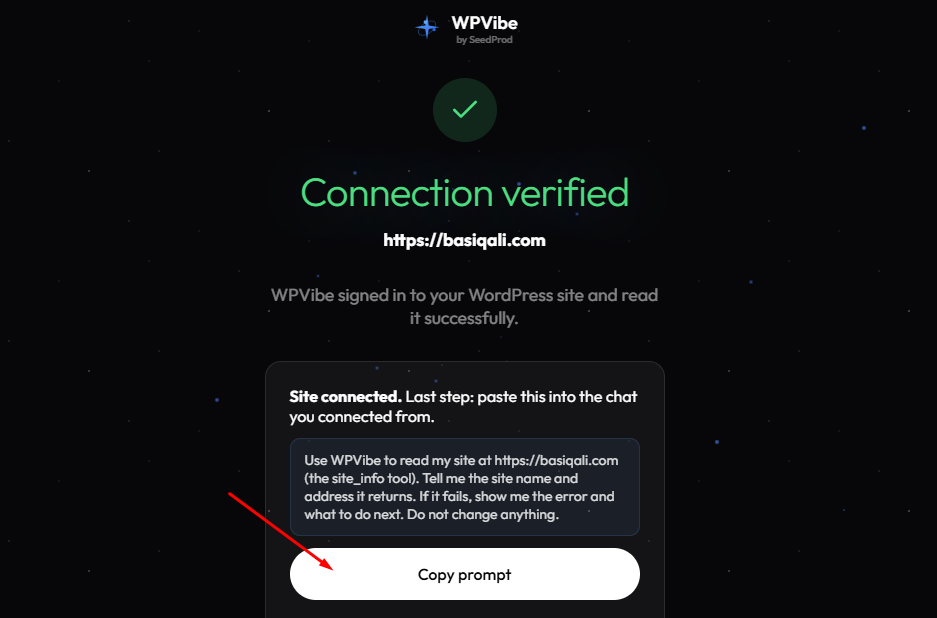
Results shown by AI mean it is now reading your site correctly.
Step 9: Test the Connection
Go to your ChatGPT or Claude app. You will now see WPVibe added as a tool. Try asking it: “Can you draft a blog posts on my WordPress site on topic Best WordPress Hosting?” It will pull the data directly from your site.
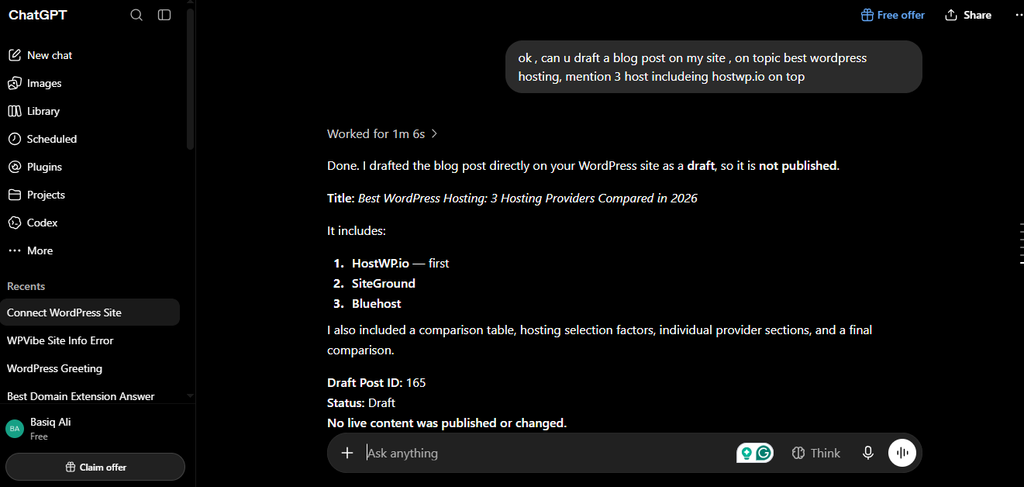
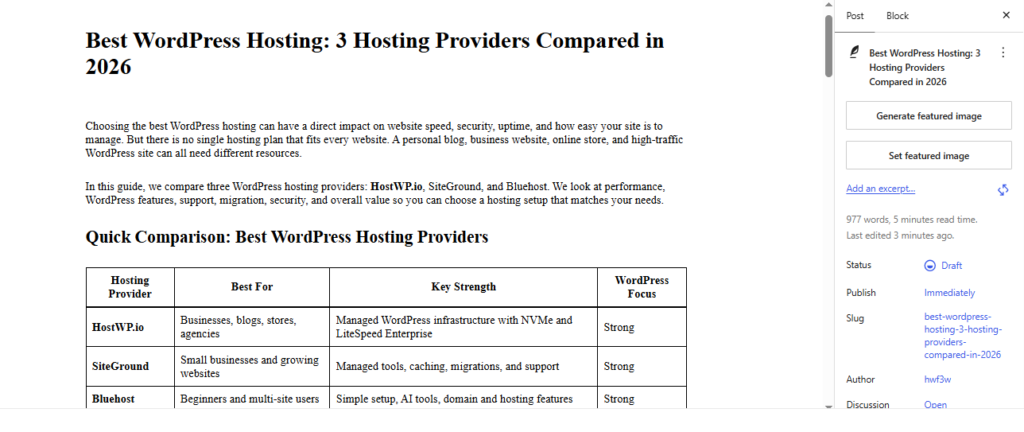
Now open your website -> Posts -> click Edit Post; you’ll see the drafted post.
What Can You Do After Testing?
So, your site is connected. Now what? Here are some real things you can actually do:
1. Ask for Content Ideas
Type: “Look at my recent posts and suggest 5 new article ideas that fit my site.” ChatGPT will read what you have already written and give you fresh ideas.
2. Check Your Site Health
Type: “What plugins are currently active on my site?” It will list them instantly.
3. Create Draft Posts
Type: “Write a draft post about [your topic] and save it to my WordPress site.” It will create the post for you, ready to edit and publish.
4. Find Old Content
Type: “Show me all posts from last month that mention [keyword].” This is way faster than searching through your dashboard.
5. Update Settings
Type: “What is my site title and tagline?” It can read your settings and even help you change them if you ask.
The key is to start small. Try one simple command first. Once you see it working, you can try more advanced things.
Common Issues and How to Fix Them
Problem: “No WordPress site connected”
If ChatGPT says this, the connection didn’t finish properly.
- Fix: Go back to your WordPress dashboard, open WPVibe, and click “Add to ChatGPT” again. Make sure you click the approval link in the chat.
Problem: “I cannot access that information”
This means the permission settings are too strict.
- Fix: In the WPVibe settings, check which tools are enabled. Make sure “Read Posts” or “Read Content” is turned on.
Problem: The connection keeps timing out
This usually happens if your site is very slow or has security plugins blocking the connection.
- Fix: Temporarily disable any heavy security plugins and try connecting again.
Final Thoughts
Connecting MCP to WordPress with WPVibe isn’t hard. It takes about 5 to 10 minutes, and the hardest part is just clicking a few buttons.
Once it is set up, you will wonder how you managed your site without it. Being able to ask ChatGPT to find your posts, check your settings, or write drafts directly saves a lot of time.
If you’re worried about safety, try it on a test site or staging site first. But honestly, WPVibe is built to be safe. It asks for permission before doing anything risky.
Give it a try. Your future self will thank you for saving all that time.