




Adding artificial intelligence to your WordPress website used to be a messy process. You had to install multiple heavy plugins, and each one asked for its own API key. This made your site slower and created security risks.
The official WordPress AI Connector framework fixes this problem. It gives you one central place to manage your AI service credentials. You configure your AI connection just once, and your approved plugins can use it safely.
This tutorial will show you exactly how to set up and use the official WordPress AI Connector plugin with OpenAI. By the end of this guide, you will have a secure and fast AI workflow ready for your website.
What is the Official WordPress AI Connector?
The WordPress AI Connector is a built-in system that standardizes how WordPress talks to external AI providers. Instead of relying on custom code from third-party developers, you can now connect services like OpenAI directly to your site.
You will find this system in your WordPress dashboard under the Settings menu, labelled as Connectors. This page acts as a secure vault. It stores your API keys in your database and safely shares them with plugins that you approve.
This setup offers two big benefits. First, it improves security by keeping your API keys in a single secure place. Second, it gives you total control over which plugins can use your OpenAI credits. This prevents poorly coded plugins from making excessive requests and draining your budget.
Step 1: Install and Activate the AI Plugin
Before you can connect to OpenAI, you need to turn on the core AI functionality in WordPress. The official AI plugin brings these features directly into your admin area.
- Log in to your WordPress admin dashboard.
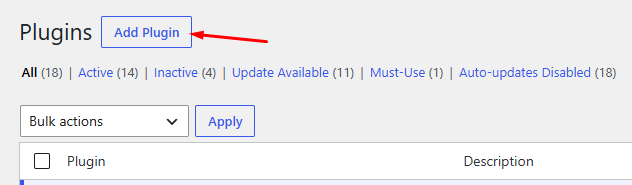
- Go to the Plugins section and click on Add New Plugin.
- Type “AI” in the search bar.
- Look for the official AI plugin maintained by the WordPress team.
- Click Install Now, and then click Activate.
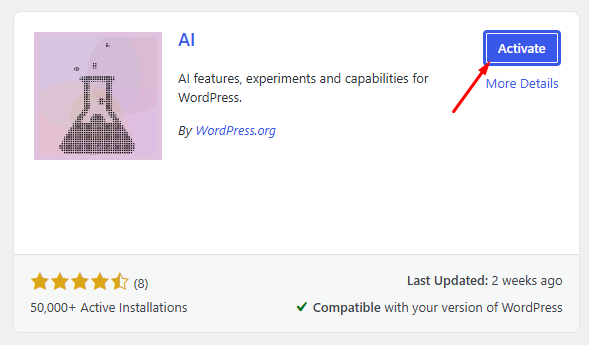
Once activated, you will see a new Connectors option in your Settings menu.
Step 2: Get Your OpenAI API Key
To connect WordPress to OpenAI, you need an API key. Think of this key as a special password that lets your website talk to OpenAI’s servers.
- Go to the OpenAI platform website and log in to your account.
- Navigate to the API keys section in your dashboard.
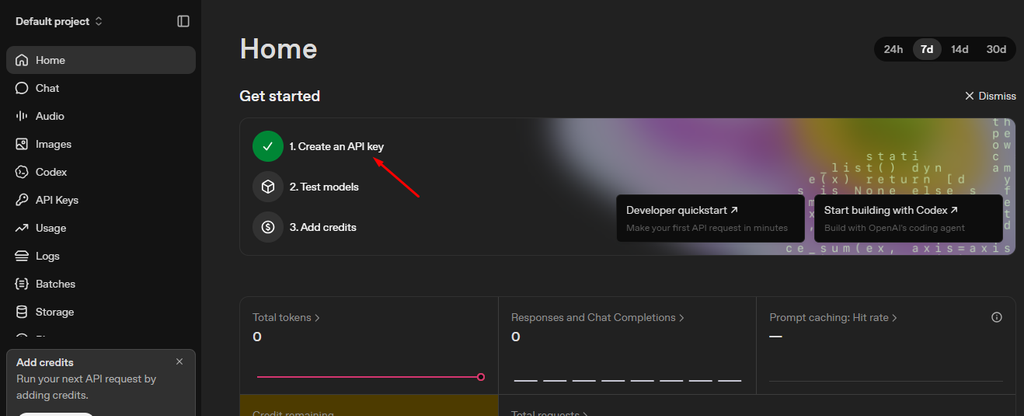
- Click on Create new secret key.
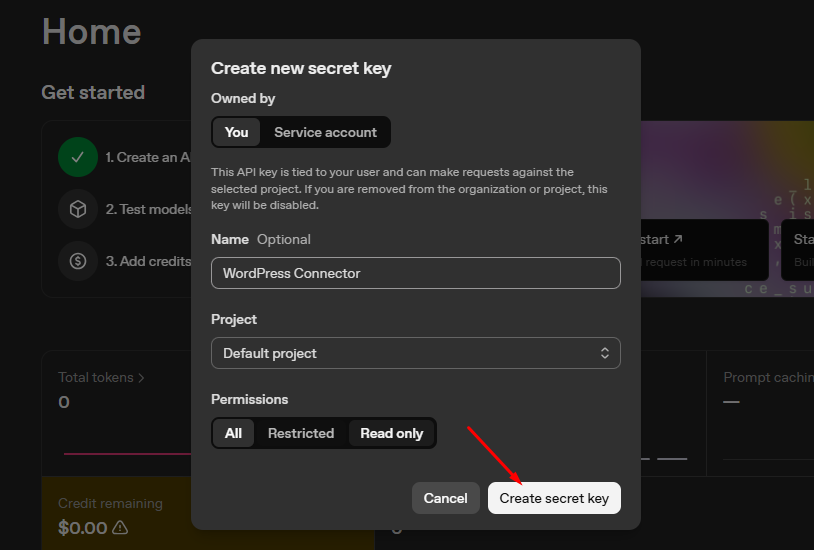
- Give it a name like “WordPress Connector” and copy the key immediately. You will not be able to see it again.
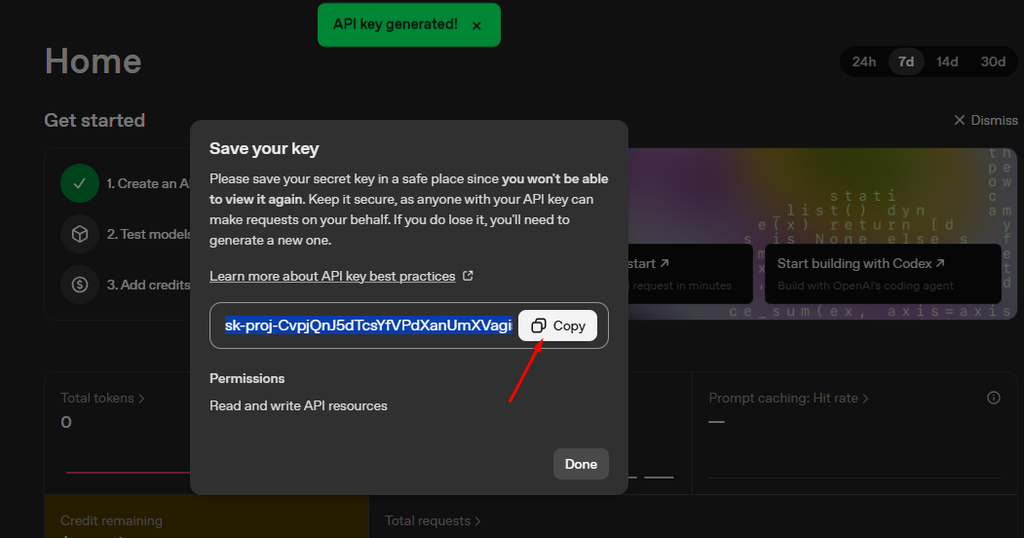
Make sure your OpenAI account has a valid payment method added. OpenAI will not let you use the API if your account balance is zero or if billing is not set up.
Step 3: Configure the OpenAI Connector in WordPress
Now you will provide WordPress with the access key you just copied.
- Go to Settings and select Connectors from the left-hand menu.
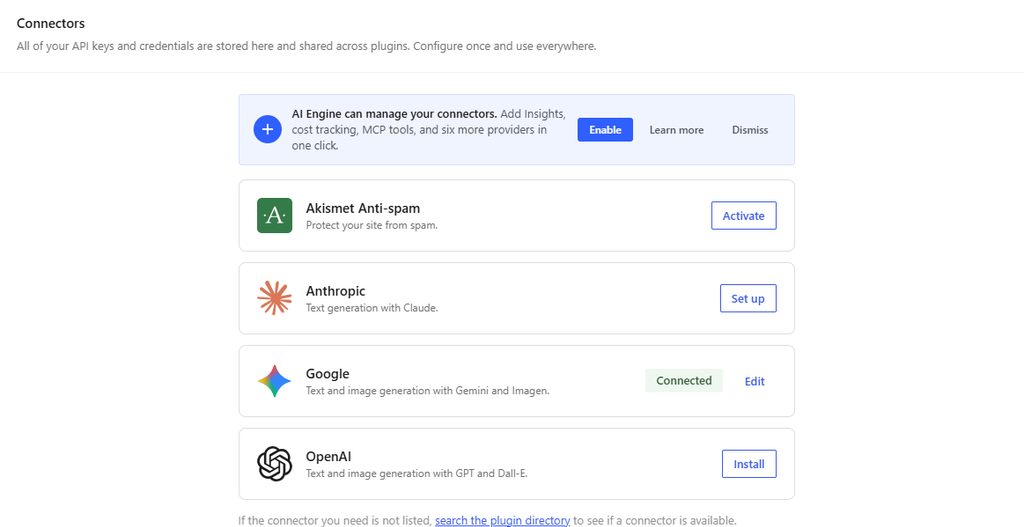
- Click on the Add New Connector button.
- Select OpenAI from the list of available providers.
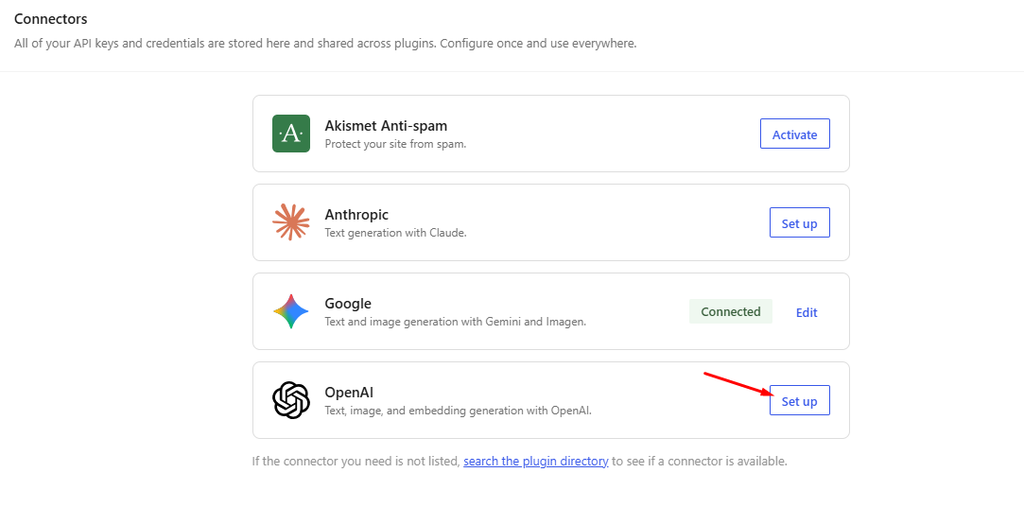
- Enter a recognizable name for this connection, such as “Main OpenAI Account”.
- Paste your secret API key into the designated field.
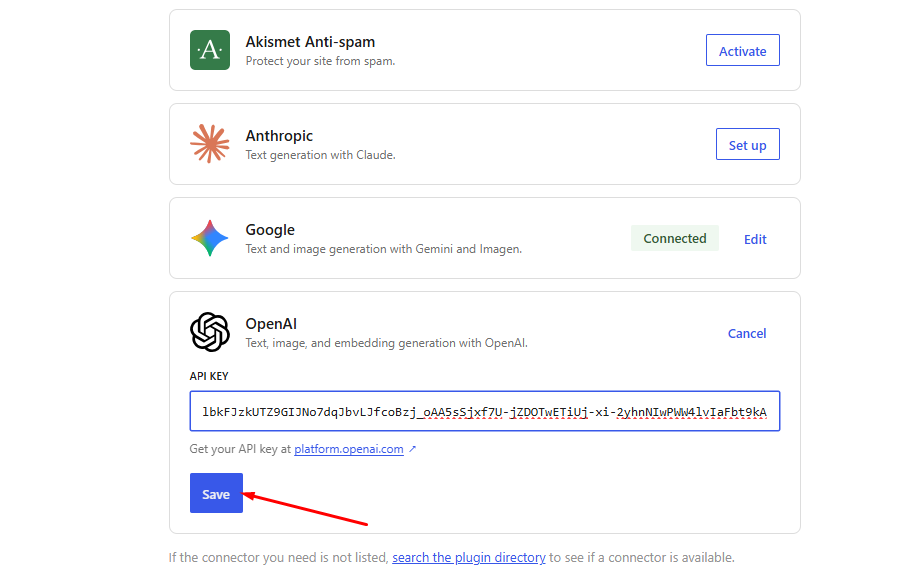
- Click Save Changes to securely store the credential.
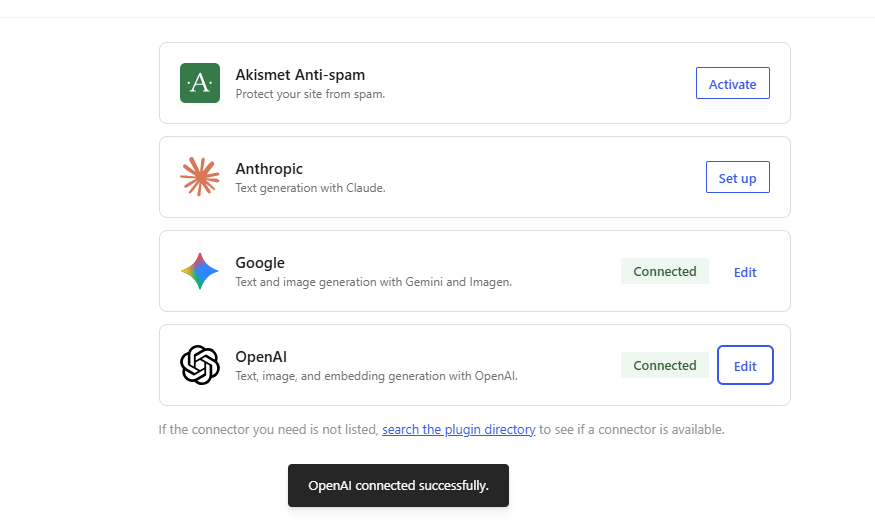
The system will run a quick background test to verify that the key is valid. If the test passes, your connector is officially active.
Step 4: Manage Plugin Permissions and Approvals
Security is very important when using paid AI services. You do not want every installed plugin to freely use your OpenAI credits. The WordPress AI system includes a strict permission layer to prevent this.
When a compatible plugin attempts to use the AI connector for the first time, it will appear as pending.
- In your WordPress dashboard, go to Tools in the left menu.
- Look for the Connector Approvals tab.
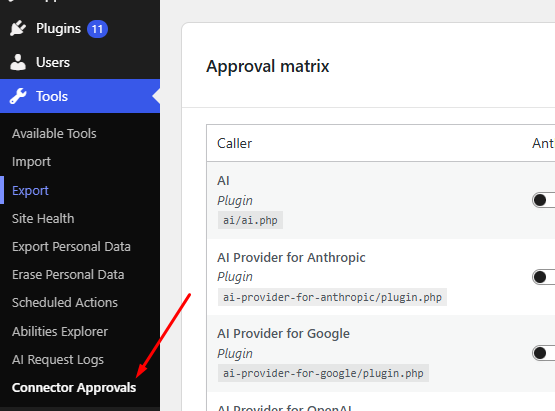
- Review the list of plugins requesting access.
- Click Approve next to the plugins you trust, or Deny for any you do not recognize.
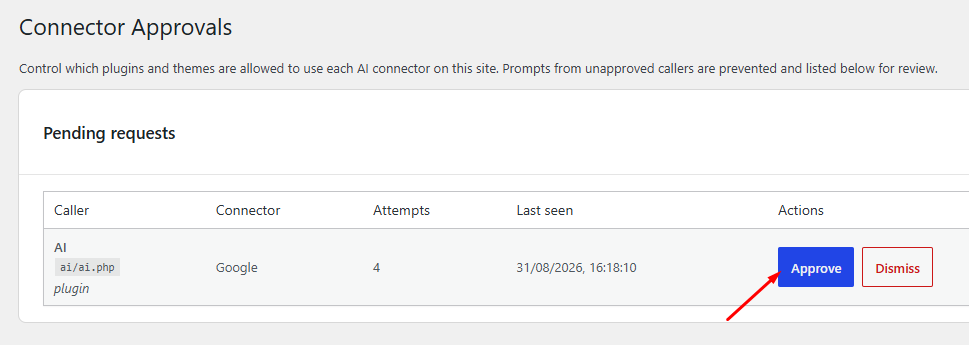
This feature lets you decide exactly which plugins can access your OpenAI account. It keeps your monthly AI bills predictable and safe.
Step 5: Use AI Features in the Block Editor
With the connector active and permissions granted, you can now use AI tools directly while writing content.
- Open the Block Editor and create a new post or page.
- Add a new paragraph block or highlight some existing text.
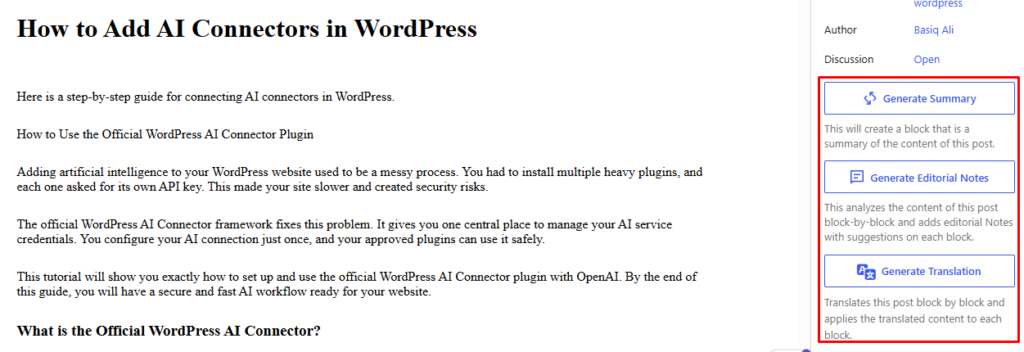
- In the Block Editor, look at the right-hand sidebar (Post Settings panel).
- You will see AI options like Generate Summary, Generate Editorial Notes, Generate Featured Image, and Generate Meta Title.
- The editor will send your request through the OpenAI connector and show the result instantly.
Step 6: Enabling Abilities Explorer in AI Connector
In the WordPress AI system, “Abilities” are the specific tasks AI can perform on your site. These can come from WordPress core, your active plugins, your theme, or custom code.
Why Abilities Matter:
- Without abilities: The AI takes more time and uses more tokens to process a request.
- With abilities: The AI completes the task quickly and efficiently because it has direct instructions on what to do.
How to enable and use them:
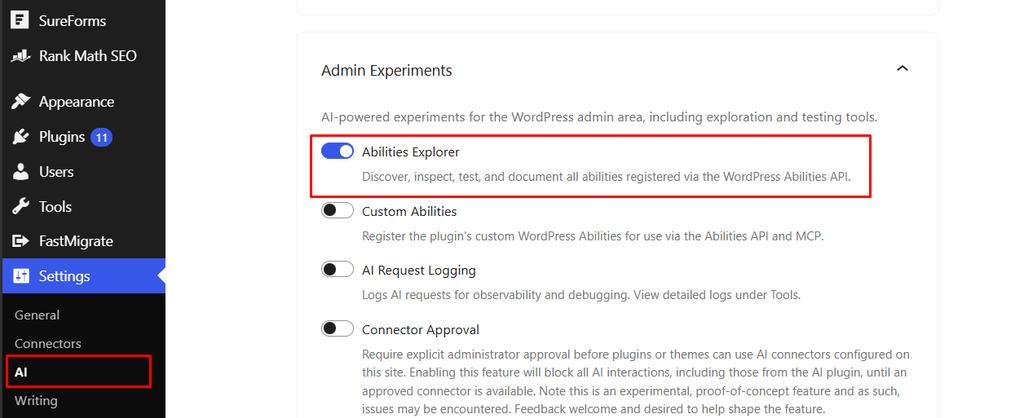
- Go to Settings > AI – Settings, and enable the Abilities Explorer.
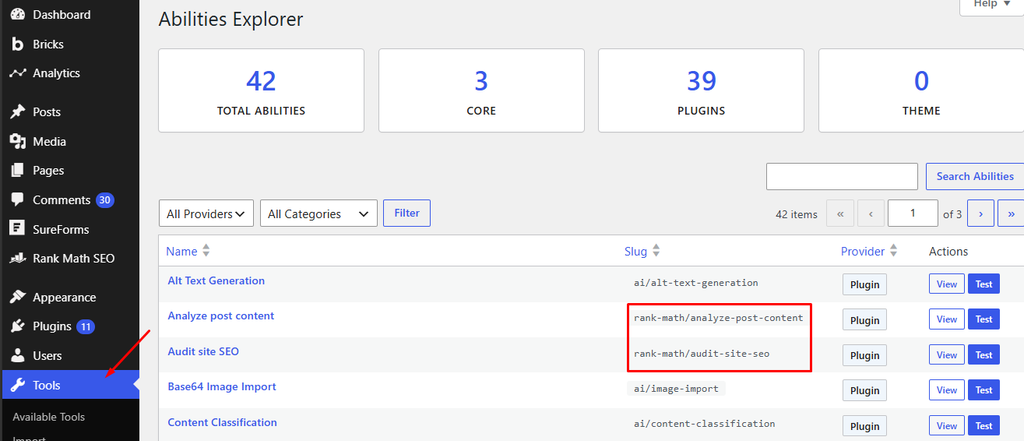
- Navigate to Tools > Abilities Explorer.
- You will see a list of available AI tasks here. For example, if you have RankMath or another AI-compatible plugin installed, its specific abilities will be listed right on this screen.
You can accept the generated text, reject it, or ask the AI to refine it further. This whole process happens without leaving the editing screen.
Troubleshooting Common Issues
Even with a simple system, you might run into minor setup issues. Knowing how to fix them quickly will save you time.
If your connector fails the validation test, check your API key for extra spaces or missing characters. Also, verify that your OpenAI account has an active billing method.
If a plugin cannot access the connector, check the Connector Approvals page again. Sometimes, updating a plugin can reset its permission status, and you will need to approve it again.
If you experience slow response times in the Block Editor, the issue is likely with the OpenAI servers, not your WordPress site. You can check the official OpenAI status page to see if they are having delays.
Best Practices for Security and Cost Management
Using AI tools effectively requires more than just turning them on. Following a few simple rules will ensure your website remains fast and cost-effective.
Always monitor your usage logs. The official AI plugin includes request-logging features to help you track exactly how many API calls are made. Review these logs every month to spot any plugins making too many requests.
Keep your API keys secure. Never share your connector settings with users who have only the Editor or Author role. Only Administrators should be able to change connector credentials.
Test with small limits first. If OpenAI allows you to set spending limits on your API key, enable them right away. This serves as a safety net in case a plugin misbehaves and unexpectedly generates thousands of requests.
Conclusion
Integrating artificial intelligence into your WordPress workflow does not have to be complicated. The official WordPress AI Connector provides a clean and secure way to manage your OpenAI services.
By following this tutorial, you have learned how to install the plugin, configure your API key, manage permissions, and generate content directly in the Block Editor. This setup saves you time and protects your website from unexpected costs.
Take some time to explore the different AI actions available in the Block Editor. As more developers build tools compatible with this framework, your centralized connector will only become more useful. This allows you to focus entirely on creating great content for your audience.