Keeping your WordPress website safe and secure should be at the top of your mind. After you’ve added your favorite WordPress plugins and chosen your beautiful theme, your next step should be protecting the investment of time, resources, and money you’ve put into your site.
This is where maintenance of your WordPress website comes in. There are a few things you should do to keep your WordPress website secure, and one of them is backing up your website and keeping copies of it on online servers.
When you regularly backup WordPress, you can protect your data from security risks and human errors. If something goes wrong, you will be able to restore a saved version of your site easily.
In this blog, we will help you protect your website by exploring three quick and easy ways to create WordPress backups. We’ll demonstrate each method so you can easily understand how it works and pick the best fit for your WordPress website.
Why Back Up Your WordPress Website?
As a WordPress website owner, you need to protect your data from unexpected events. Creating a website backup is one way to do this.
Security threats like hackers, malware, and phishing attacks can compromise your site. Additionally, human errors, plugin conflicts, and server failures can also put your site at risk. Without a backup, recovering your site can be challenging.
A WordPress backup saves a copy of your site’s important files, folders, and databases. This includes your content, plugins, themes, images, videos, settings, and other information. You can easily use the backup to restore your website in case you get locked out because of an error, or your website gets compromised during a cyberattack.
Method 1: Use Backup Features Provided by your Hosting Provider.
Backup policies are included in managed WordPress hosting providers, just like at HostWP.io we provide automated backups of all WordPress websites, including emails and databases on third party offsite cloud servers powered by NVMe storage.
Jetbackup 5, a premium backup software is built-in to HostWP.io’s control panel and is available to use for all our clients. By default, our systems take incremental backups of all websites every hour, and each copy is retained for 90 days on our offsite server.
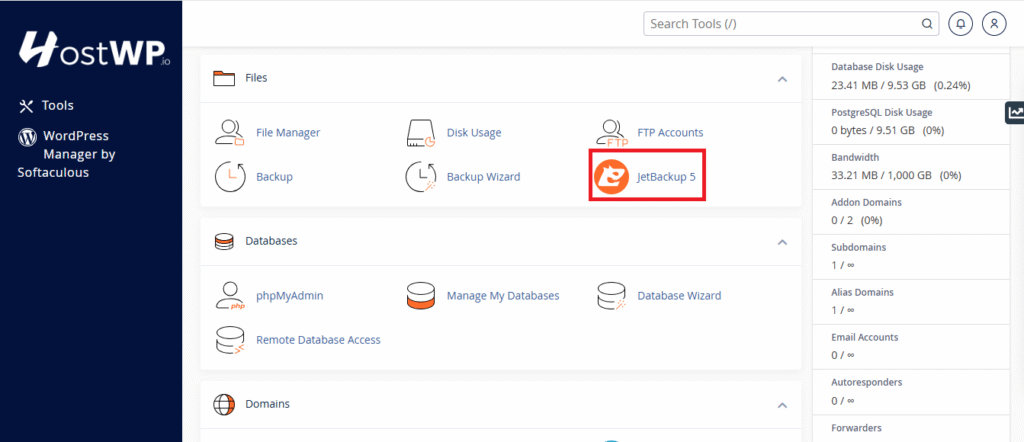
1. Accessing JetBackup 5 on HostWP
- Log in to your HostWP control panel.
- Navigate to JetBackup 5 under the “Files” section.
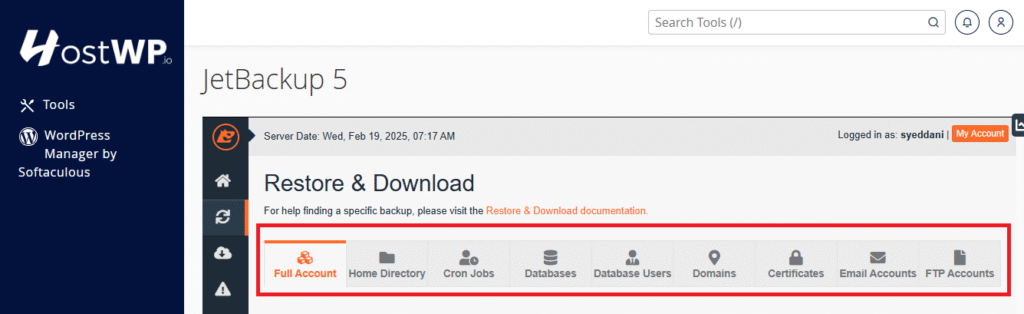
2. Backup Options Available
- Full Account Backups: Restore your entire cPanel account.
- File Backups: Restore individual files or folders.
- Database Backups: Restore MySQL databases.
- Email Backups: Restore specific email accounts or emails.
- Cron Jobs & DNS Zone Backups: Restore cron jobs and DNS settings
3. Restoring Backups
1.Open JetBackup 5 in cPanel.
2.Choose the backup type
3.Click Restore and confirm.

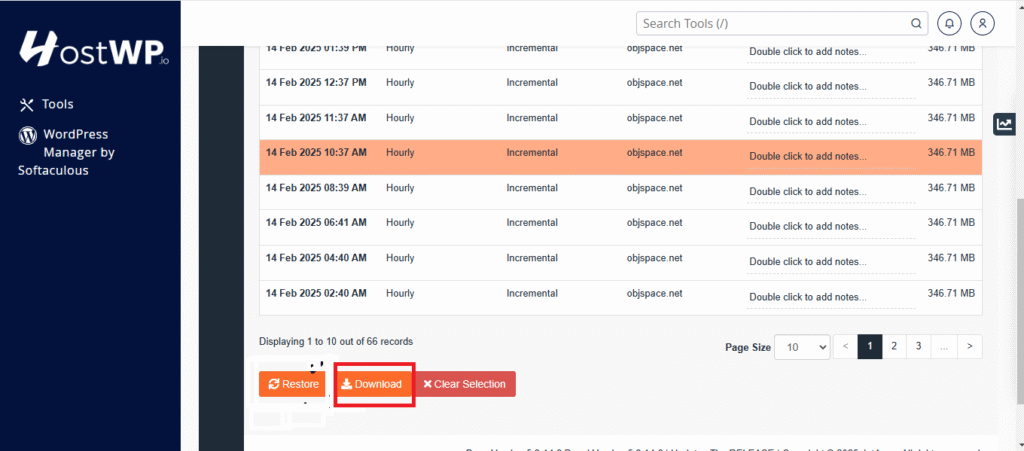
4. Downloading Backups
You can also freely download backups for local storage or migrating to another server.
Navigate to the desired backup type and click Generate Download
Method 2: Use a Backup Plugin (Duplicator)
Duplicator is a WordPress backup plugin for easily backing up and moving your website. It creates a complete backup of your site, including all files and databases, and allows you to download it as a zip file or upload it to a cloud storage service.
You can also schedule automated backups. Its standout feature is the ability to package your website into a single archive file, making it easy to restore or migrate your site to a new server or domain. Duplicator Pro (starts at $99/year) offers advanced features like cloud backups, multisite, and priority support.
Steps to Backup Using Duplicator:
- Log into your WordPress Dashboard.
- Navigate to Plugins > Add New.
- Search for Duplicator, install, and activate it.
- Go to Duplicator > Packages > Create New.
- Click Next, let the plugin scan your site, and then click Build.


6. Once the process is complete, download both the Installer and Archive (ZIP) files.

- Store them in a secure location, such as Google Drive, Dropbox, or an external hard drive.
✅ Why This Method Works:
- Duplicator gives you full control over your backups.
- It allows easy migration to a new host if needed.
- With the Pro version, you can schedule automatic backups.
❌ What to Watch Out For:
- Large websites may experience slow backup speeds or require premium features.
- You must manually download and store the backups for maximum security
Method 3: Creating a backup manually.
Data loss isn’t a question of “if” but “when.” According to a study by Backblaze, 1 in 3 people will experience data loss at some point due to accidental deletion, hardware failure, or cyber threats.
Despite the convenience of cloud backups, relying solely on them is a gamble you don’t want to take. That’s why creating a manual backup is a critical step in ensuring your important files, photos, and documents remain safe—no matter what happens.
Why a Manual Backup is Essential
Automatic cloud backups and external drives with scheduled backups are useful, but they can fail without warning. Cloud services can suffer outages, accounts can get hacked, and automatic processes don’t always back up everything you need.
A manual backup puts you in full control, allowing you to select, organize, and verify your most important data without relying on external factors.
Steps to Create a Manual Backup
Log into cPanel
Step 1: Backup Website Files (Manual Method)
If you only need to back up your website files, follow these steps:
- Go to File Manager under the Files section.
- Navigate to the public_html folder (or the folder where your website is stored).
Select all files and click Compress.
If you only need to back up your website files, follow these steps:
- Go to File Manager under the Files section.
- Navigate to the public_html folder (or the folder where your website is stored).
Select all files and click Compress.
If you only need to back up your website files, follow these steps:
- Go to File Manager under the Files section.
- Navigate to the public_html folder (or the folder where your website is stored).
- Select all files and click Compress.

- Choose ZIP Archive and name your backup file

- Click Compress Files, this action will create a .zip file and you can download this ZIP file to your local computer.
Step 2: Backup MySQL Database
To back up your database, follow these steps:
- Go to phpMyAdmin in cPanel under the Databases section.

- Select the database associated with your website from the left panel.
- Click Export at the top.

- Choose Quick as the export method and SQL as the format.
Click Go to download the sql file.
You can use these manual backups and upload them to another server or on your local pc and use them as staging sites.
We recommend to all our clients and website owners to have a multi-tier backup policy for their WordPress websites. It is good to take backups using a plugin like Duplicator or Blogvault and save them to your own cloud storage like Google Drive, Dropbox etc. along with properly understanding how backups work at your hosting provider.
At HostWP.io all our websites are regularly backed up, scanned or malware or other malicious code, and are protected by a WAF. The security of your WordPress websites is of top concern for us, that is why we provide completely managed experience on our hosting servers.