
Did you know that over 50% of web traffic worldwide comes from bots? Some of these bots are harmless, but many are built for malicious purposes like spamming your forms or exploiting your website resources. If your website doesn’t have a mechanism to filter out these bad actors, you’re leaving the door open to unnecessary risks.
That’s why learning how to install reCAPTCHA in WordPress contact form is critical. reCAPTCHA, a tool developed by Google, not only protects your site from spam and abuse but also adds reassurance for your website visitors.
“…almost 50% of internet traffic comes from non-human sources. Bad bots, in particular, now comprise nearly one-third of all traffic. Bad bots have become more advanced and evasive and now mimic human behaviour so that it makes them difficult to detect and prevent.” ~2024 Bad Bot Report
4 Steps to Insert reCAPTCHA in WordPress
Previously, we covered how to add a contact form on WordPress using the free Forminator plugin. However, using a contact form without any protection or validation will cause us to receive spam. To prevent spam submissions, the best way to secure our forms is to add Google reCAPTCHA. The method we are going to cover below is also applicable to other form plugins.
Step 1: Enable reCAPTCHA in Forminator
- Log in to your WordPress dashboard.
- Navigate to Forminator in the sidebar and go to the Settings menu.
- Click on the reCAPTCHA tab.

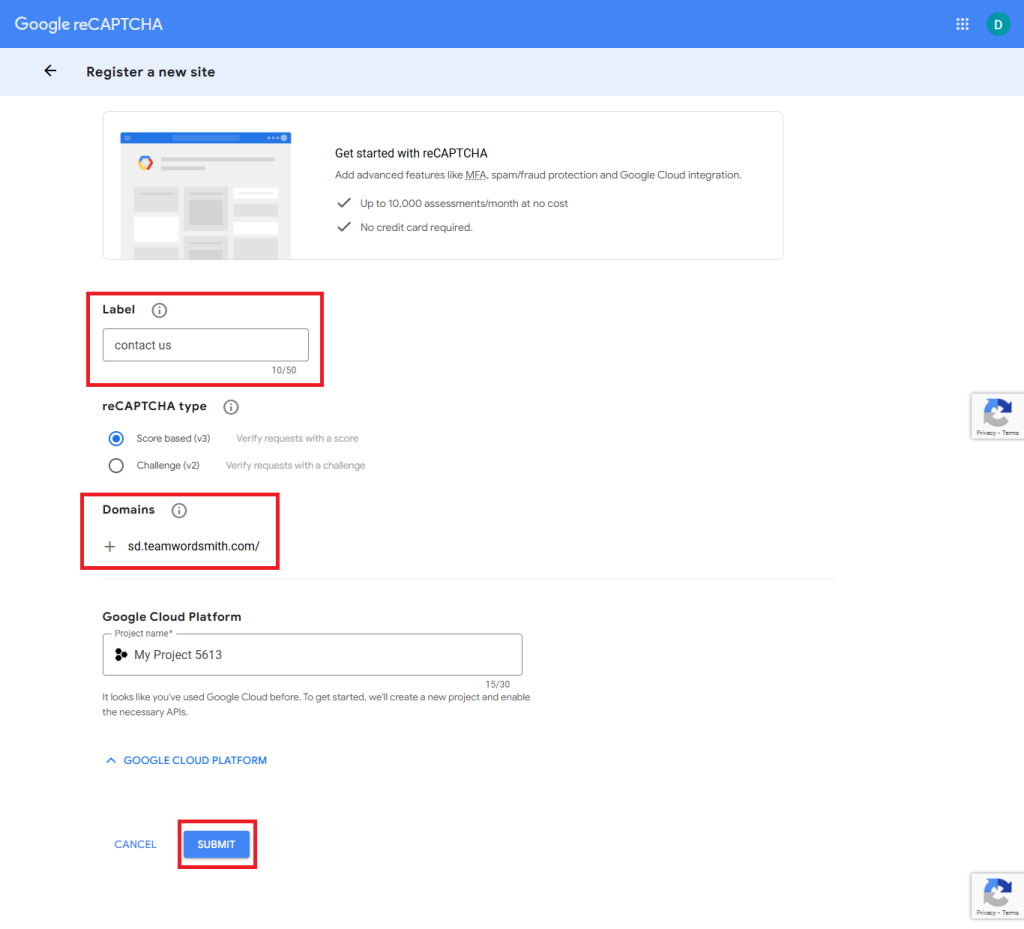
Step 2: Register Your Website on Google reCAPTCHA
- Go to the Google reCAPTCHA website.
- Click on the Admin Console in the top right.
- Sign in with your Google account.
- Register your website:
- Provide a label (e.g., “My Website Form”).
- Choose the reCAPTCHA type (e.g., v2 Checkbox, Invisible, or v3).
- Enter your website’s domain.
- Accept the terms of service and click Submit.
- Copy the Site Key and Secret Key.

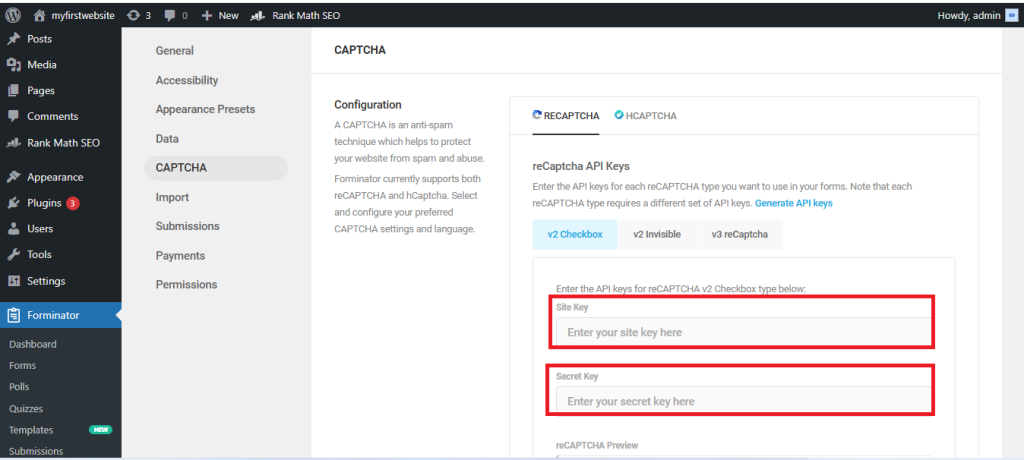
Step 3: Configure reCAPTCHA in Forminator
- Return to the Forminator reCAPTCHA settings in your WordPress dashboard.
- Paste the Site Key and Secret Key into the respective fields.
- Choose the desired reCAPTCHA type that matches what you selected in Google reCAPTCHA.
- Save your settings.

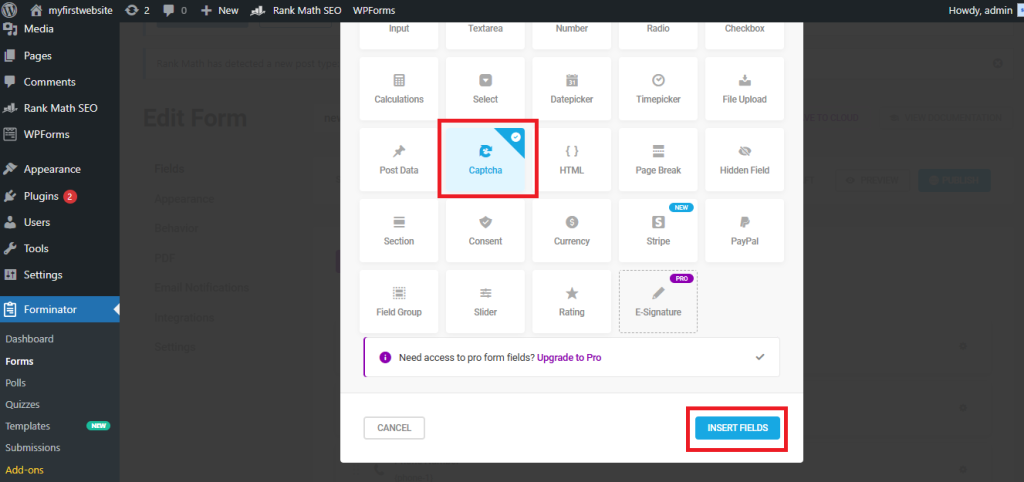
Step 4: Add reCAPTCHA to Your Form
- Go to Forminator > Forms.
- Edit the form where you want to add reCAPTCHA.
- In the form builder, click on the + INSERT FIELDS button.
- Select the reCAPTCHA field and drag it into your form.
- Configure the field settings as needed (e.g., reCAPTCHA type, alignment).
- Save your form.

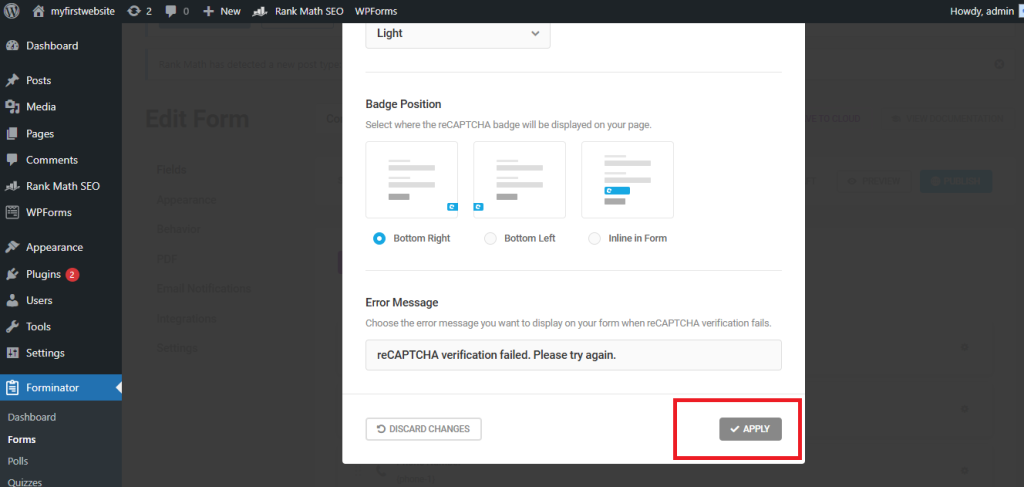
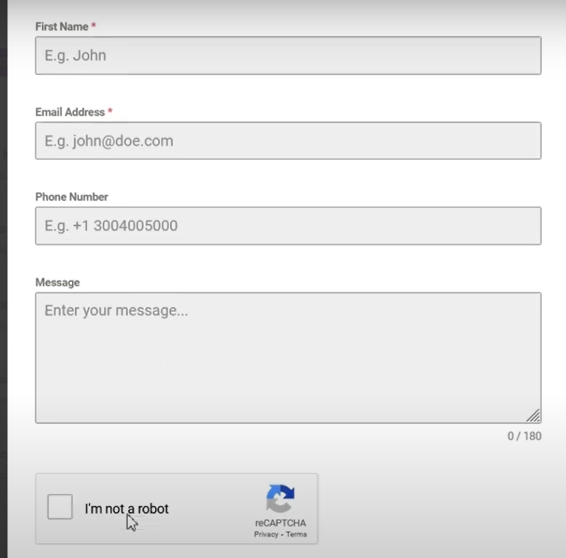
After integrating reCAPTCHA, the form offers an added layer of security, effectively preventing spam and automated submissions. While viewing the form on the front end, you and your visitors will see a badge on the bottom left of your page, as shown in the image below.
There are more use cases for reCAPTCHA on WordPress. For example, you can use it to protect your log-in, registration, and WooCommerce checkout pages.
Keeping your website safe from spam helps you manage it much more efficiently and also protects you from receiving malicious submissions.
Most importantly, reCAPTCHA works seamlessly in the background, allowing real users to browse and interact with your site without interruption. Its unobtrusive design ensures your visitors won’t feel inconvenienced while enjoying a safer and more secure experience. Adding reCAPTCHA isn’t just about keeping out the bad actors—it’s about showing your audience that their security and time are your top priorities.