

Creating a WordPress website is the beginning of building an engaging online presence. One of the most essential features for any site—be it a portfolio, blog, or small business—is a contact form.
Not only does it provide visitors with a simple way to get in touch, but it also adds a layer of professionalism to your site. However, choosing a WordPress contact form is crucial. Using an outdated or poorly maintained plugin can lead to security vulnerabilities and functionality issues down the line.
As WordPress experts with years of experience, we have used many contact forms and customized them to fit the needs of various customers. This article will cover the basics of adding a simple contact form to a WordPress website and creating a “Contact Us” page. This “Contact Us” page can be used by portfolios, bloggers, and small business sites. The plugin that we will use is Forminator it is free to use, it has 500k+ installs, and it is constantly updated.
How To Create A Contact Form With Forminator
Step 1 : Installing the plugin
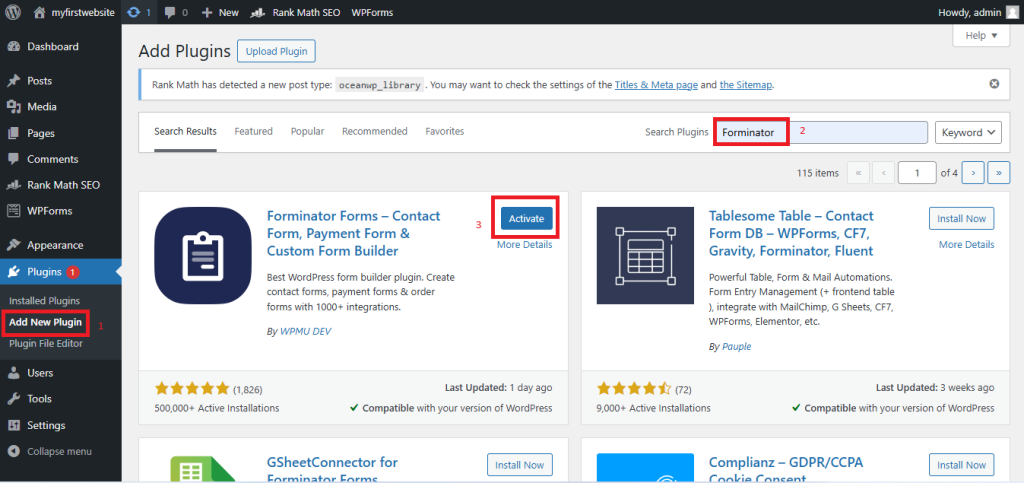
Log in to your WordPress dashboard, navigate to Plugins > Add New Plugin, search for Forminator, click install, and activate.
This will install the free version of Forminator. This plugin also has a paid version that can be found on WPMU Dev’s website on this link.
Step 2: Creating a Contact Form
Once the plugin is activated, you’ll see Forminator in the WordPress dashboard menu.
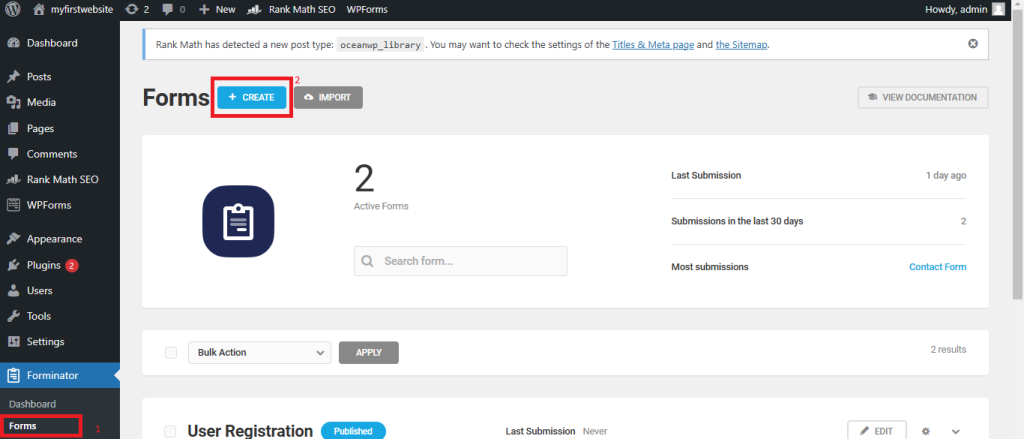
Go to Forminator > Forms from the WordPress dashboard.
Click on the +Create button to create a new form
You will be prompted to choose a Form Type. For a basic contact form, select Contact Form. You can also create Polls, Quizzes, or Custom Forms, but a Contact Form is the most common option for a basic form.
Click Create after selecting the form type.

After selecting Contact Form, you’ll enter the Form Builder, where you can add and customize form fields.
Add Fields: Forminator comes with several pre-built fields such as:
- Text (for name, address, etc.)
- Email (for user email input)
- Textarea (for longer messages)
- Radio Buttons and Checkboxes (for selection fields)
- Dropdown (for multi-choice options)
- File Upload (if you want users to upload files)
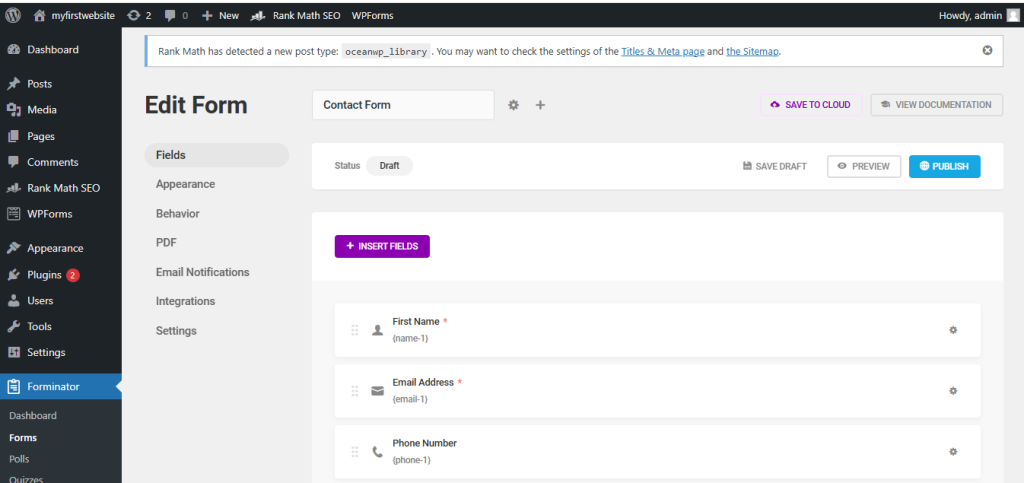
After saving your form, click Publish to make it live.
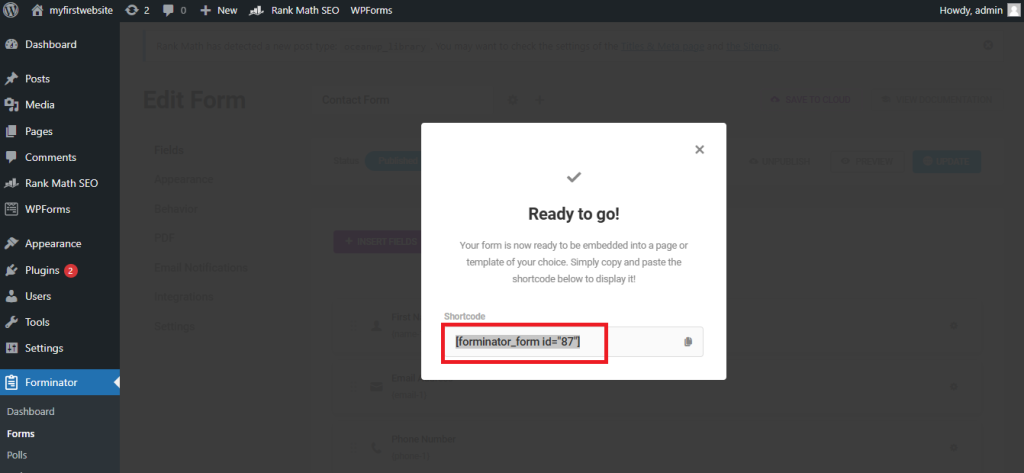
The forminator will generate a shortcode for your form.
The shortcode will look like: [forminator_form id=”123″] (the number will be specific to your form).
Step 3: Create a new page, “Contact Us”
The most common use of contact forms is on the Contact Us pages, you can also add this form on any other page.
Navigate to Page > Add New Page and name this page “Contact Us”.

Step 4: Adding Contact form on the “Contact Us” page
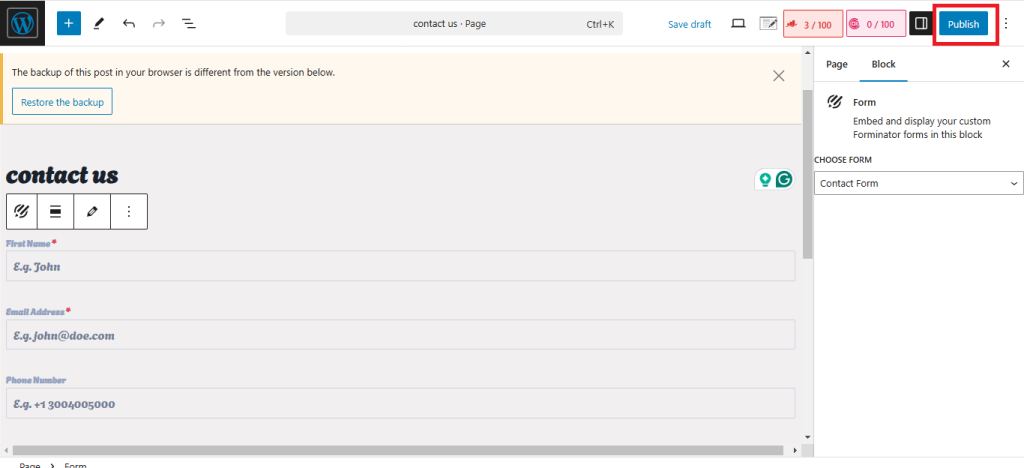
Embed the shortcode in a WordPress page
- Classic Editor: Simply paste the shortcode into the content area of the page where you want the form.
- Block Editor (Gutenberg): Add a Shortcode block, then paste the shortcode into the block.
Publish the Page to display the form on your site.
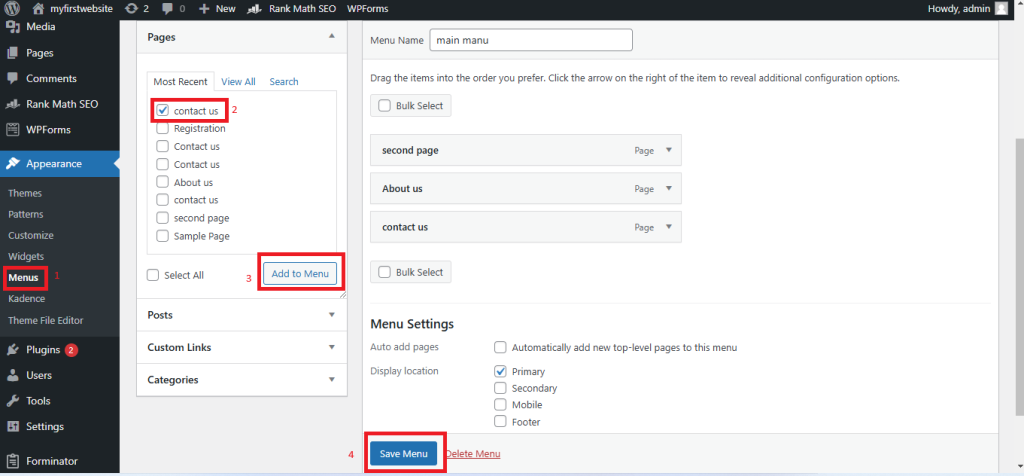
Step 5: Add “Contact Us” Page in the Main Menu
Go to Appearance > Menus in the WordPress dashboard.
Check the box next to your page and click Add to Menu
Once your page is added to the menu, click Save Menu.
That’s it; that is how to add a contact form to WordPress website. It is better to check it yourself to make sure it is working. If you run into any issues with contact forms, feel free to contact us or your hosting provider.
Top WordPress Contact Form Plugins
Forminator is a good plugin, but other popular contact form plugins can help you achieve the same results. Some of the popular paid contact form plugins are.
- WS Form (Get 20% Off)
- Bit Forms (30% off)
- FluentForms (Get 20% off)
- Formidable Forms (Get 50% off)
- Gravity Forms
The form plugins listed above come with advanced features that allow you to create any type of form on your website, even a calculator or a survey form. Free plugins do not allow that.